Hello crafty peeps - welcome to my crafty nook! I can't believe it's nearly the weekend again - where has this week gone? I hope you've all had a good week and have lots of crafty plans for the weekend. My "crudy" still leaves a lot to be desired but one good thing has come from all this chaos - I've finally found the star dies that the craft gremlins had stolen inside a Amazon cardboard wrapper of all places (I save them in case I can think of a way to re-use them!), fingers crossed they'll put the water colour pencils in a place I'm going to look very soon too lol. Please excuse any typos that I may miss, my fur baby Jinx is being 'challenging' and keeps standing on the keyboard, in front of the screen or on my head! Not sure how he quite manages the last one as he is quite a big cat - I can only conclude that I have a giant head!!!
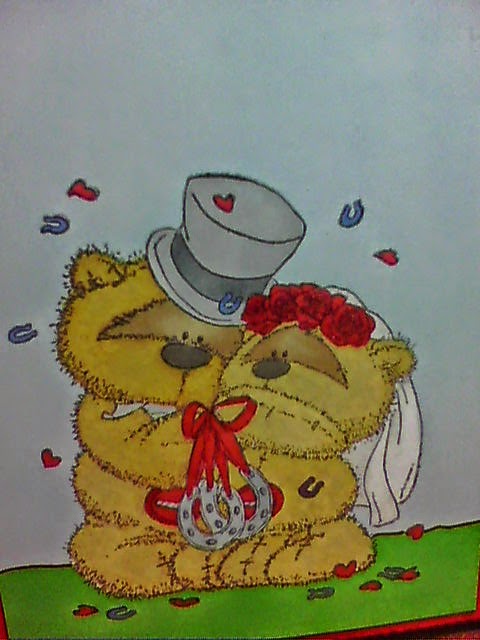
Anyway back to the main reason for this blog post - this week's challenge is Teddy Bears and one that I again found challenging (but not as challenging as Jinx!) not because I don't have the right supplies but because I have too many (what a lovely complaint to have, right?) and it was extremely difficult to chose which bear stamp to use. In the end I chose a Fizzy Moon stamp called Wedding Bells which I bought at the beginning of last year from my local craft shop. TBH I usually rigorously follow the coloured image on the packaging which is fine when it's something like "Tatty Teddy" or the "Forever Friends" bear where the images are well known but I think a little experimentation is good for images that don't have that brand recognition (saying that I haven't been in a card shop for about 10 years so I've no idea if Fizzy Moon is as popular as the two brands already mentioned - people may be horrified with the way I've coloured the two bears!) One of the reasons I've started to take part in the challenges on Passion for ProMarkers is to push myself out of my crafting comfort zone and not following the packaging of this stamp really did do that (babysteps still) saying that though the colouring isn't that different to the original. I've also tried a new way of colouring fur (new to me anyway) and instead of using pens in the same colour wave (yellows with yellows etc) I've actually blended mustard yellow with either caramel (Bride) or cinnamon (Groom) AND if that wasn't Avant Garde enough I scribbled the brown colours all over the images (obviously keeping inside the lines - I'm not that much of a rebel!) before going over it with the mustard! - Yes you did read that right, I SCRIBBLED!!! lol As usual my camera lets me down so you can't see how much texture this method gives the bears, they look all nubbly and worn in real life, just like the ted does that I've had since I was born. My husband and I married relatively late in life (we'll probably be pensioners when we celebrate our silver wedding anniversary) so I find the thought of middle aged bears getting married oddly comforting and I think other late bloomers would like it on their wedding card too.
 |
| Fizzy Moon Wedding Bells 8" x 8" card |
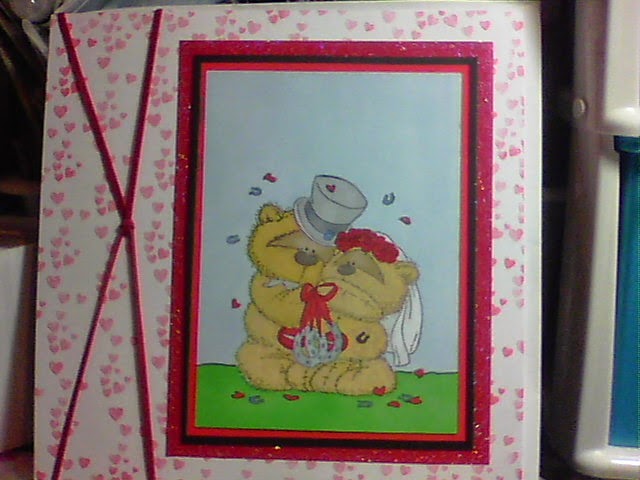
I stamped the card blank all over using a heart stamp from the Clearly Besotted range called "Love Chemistry" (I think)
* I've checked and the Clearly Besotted Stamp set used is actually called "Scientifically Speaking", sorry about any confusion caused, the hearts are meant to bubble out of a test tube or beaker but I thought they'd be perfect to reduce the starkness of the white card blank. I layered the main image on red card, black card and then holographic paper from Paper Cellar. I originally made red paper roses to stick on the top right and bottom left corners of the card but couldn't bring myself to clutter the card up (now that would truly be a hard challenge for me - use lots of embellishments!) so I made a couple of red felt coiled roses which I still couldn't face using lol. Instead I off centred the stamped image and added two lengths of suede cord tied in a knot in the centre which I added to the left hand side of the card. I've just realised I've forgotten to add a sentiment - please pretend it's there.
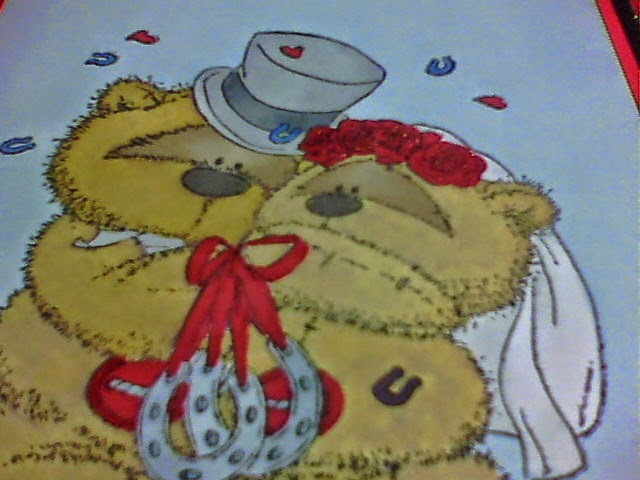
Here are some close ups.
I couldn't resist adding some clear Wink of Stella to the roses, hearts and belly buttons on the bears.
I hope you like my new card, as always if you have any questions or comments please leave them below or in the comments form in the side bar if you want to say something not for public viewing.
A Few Sites You Might Like To Visit
click to enter teddy bear challenge
Every Crafts A Pound has got some FABULOUS new stock in including Papermania's Chronology metal embellishments and stamps - very steampunk and similar to Tim Holtz clock faces, cogs and spinners but only £1!!!!
Please let me know if you like having sites to visit on my blog and if you do I'll continue to link sites as appropriate on my posts. Until next time - keep crafting!
Love and crafty hugs,
Sarah xxx