Translate

Tuesday 30 June 2015

A CAS card for Kate (entry for Passion For ProMarkers Blog Challenge)

Hello crafty peeps and welcome to my crafty nook! I hope you are all enjoying the mini heatwave, it's going to be even hotter tomorrow. I've even opened the window in my crudy so it must be hot! I've made a few cards since my last blog post but I'm only going to share one with you today as I'm waiting for the recipients to get their cards before I add them to my blog as at least one person who will be getting a card in the next day or two reads my blog and the other (actually both people are) is a Facebook friend so might see the card beforehand on my timeline. I'm fairly certain my friend Kate doesn't read my blog and as far as I know she doesn't go on Facebook anymore so I'm safe to show her card here. I've chosen a 'clean and simple' card to send to Kate for two reasons, it's her style and it fulfills the challenge over at Passion for ProMarkers. I really wanted to enter the challenge last week but was unable to enter it in time due to having a migraine that's still lingering 4 days after it started. I was determined to submit a card for this week's challenge and the theme of Clean and Simple suited me down to the ground.

Clean and Simple "Party Paws" card

I've used a Crafter's Companion stamp from the Party Paws range and coloured it in using a combination of ProMarkers and FlexMarkers. Once the image was coloured in I mounted it onto a white card blank using 3mm foam tape to give it a bit more interest while preserving the CAS feel to it. I also highlighted some of the image using clear Wink of Stella brush marker. I really like the CAS style mainly because I'm not very good at colouring in the backgrounds but feel obliged to with most cards.


The card from a different angle x

I hope you like my latest card - I think these images from Crafter's Companion are so cute and I can't wait to have a play with the other two images I have. As always if you have ant questions or comments then please leave them in the usual places and until next time - keep crafting!

Love and crafty hugs,

Sarah xxx

Friday 26 June 2015

Prom Card

Hello crafty peeps and welcome to my crafty nook! I can't believe it's Friday again already and it's a very special Friday as it's my niece's Prom tonight.

My beautiful niece all ready for her Prom

Doesn't she look gorgeous in her dress??
To celebrate her prom and the end of her school year (college in September!) I made Charlie a card with a dress similar to the one she's wearing only the one I did is a bit more Big Fat Gypsy Wedding!

Prom Card for Charlie
A few months ago I got some printed uncoloured toppers from Every Crafts A Pound called "Grandma's Wardrobe" and a selection of 50 Dimension Forth Stamps for £10. All the clothes (plus a few more that I couldn't fit in the wardrobe) came from this stamp goody bag. I stamped them onto card, coloured them in using FlexMarkers (my favourite colour medium at the moment) and then fussy cut them out. I decorated the purple dress using nail art gems and a touch of clear Wink of Stella marker. I fastened the clothes onto mini wire coat hangers using waxed cord and washi tape. I coloured Grandma's Wardrobe using FlexMarkers and carefully cut around three sides of the left hand door so it could be opened. I added square brads to the doors and drawers as shown. I coloured in a length of bamboo skewer to make it look like a clothes rail and then I added a double thickness of black foam tape around the edges of the wardrobe making sure I 'trapped' the rail between them. I then added this panel to some kraft coloured card stock. I added a panel of holographic film to the back of the open door to make a mirror then added clothes to the rail and to the outside of the wardrobe as shown. I then adhered the wardrobe topper onto an A6 card blank.


I'm quite pleased with how this card turned out although I need to find a better way to stick the clothes to the wire coat hangers.

I've got a few more cards I'd like to work on now my crudy is nearly organised so I hope to have a couple of cards to share with you over the weekend. If you have any comments or questions then please leave them in the usual places and until next time - keep crafting!

Love and crafty hugs,

Sarah xxx

Tuesday 23 June 2015

Happy Day

Hello crafty peeps welcome to my crafty nook! I hope you've all had a brilliant Tuesday and if not just think, we're almost half way to the weekend! :) I'm not sure if anyone remembers me mentioning that I was taking part in a Readers' Design Team for Quick Cards Made Easy Magazine a couple of months ago but the magazine has finally come out! They only show three cards of the ten submitted and the others are supposed to be on a readers' gallery on their website. I've looked (pretty much every day since I got my subscription copy on Friday) and I can't find a readers' gallery on the website. As you can probably tell my card wasn't one of the three showcased in the magazine (check page 40 to see the beautiful designs that were - I especially like the one that used the Large Ringlets die by Memory Box, I will so be getting that die when I've got some money!) however if you look at the bottom right hand corner of the page where it says, "Find more amazing reader cards at www.cardmakingandpapercraft.com" you may notice a rather simple card in blue polka dots - that's mine! To be perfectly honest it's taken me until this afternoon to actually notice it which just goes to show how much I need to go have my eyes tested! I'm thrilled to be able to say that QCME magazine have also put my card up on their timeline along with the three showcased cards and if you'd like to have a look please click the link here https://www.facebook.com/QuickCardsMadeEasy if it's not showing please click on QCME photos and it's under the heading Reader Design Team issue 141 or click on the Facebook button on the sidebar and check out my timeline.


Here are a couple of photos just in case you aren't on Facebook. As you can see I kept my design very simple, the brief for the card was that it had to be flat, no larger than 15cm square and that the papers had to be the main focus of the card. We were allowed to use basic craft supplies. I think I may have taken the brief too literally (I do have a habit of doing exactly what is stated) as the cards showcased had 3D elements to them (absolutely gorgeous though!) and I even die cut a panel within the frame so it would lay totally flat rather than being layered and raised as I would normally do. I chose the simplest of the patterns available mainly because as they were mostly bird and floral patterns, I was worried that the sentiment would be overwhelmed by any other pattern apart from this polka dot one. And if I'm honest I really like polka dots! If I had the chance to do the card again I'd probably be a little bit more daring and add more layers to the card and a couple of embellishments. It was a lot of fun and I'm chuffed beyond words to see my card both in the magazine and on Facebook.

I'm progressing nicely in the Crudy Reshuffle, it's not complete but to be honest it's the sort of room/project that's always going to be a work in progress. I'm loving the extra room I have to actually craft, even though the surface of the breakfast bar is covered with items looking for a home (craft orphans - poor things!) I still have twice as much room as I did on my desk - in fact I actually had my paper trimmer fully on the desk rather than half on and the other resting on me! It's making a huge difference to being able to cut a straight line lol. I have a couple of projects that I need to complete in the next few days so once I've added this post to my blog I shall go into the crudy and find new homes for the craft items on my desk. Then I shall get on with Charlie's prom card (luckily I found the stamped and coloured images I've already done when I was putting stuff back). Once it's finished I shall add another post. As always if you have any comments or questions that relate to either this blog or to crafting please leave them in the usual places, please be aware that all comments are subject to moderation and any that I consider to be spam will not be added to this blog. By all means add links to your craft blogs but please don't add links to electroplating, lifestyle sites or similar - it's rude quite frankly. Mini rant over! lol. Until next time - keep crafting!

Love and craft hugs,

Sarah xxx

Sunday 21 June 2015

Happy Father's Day Card

Hello crafty peeps and welcome to my crafty nook! I hope you've all had a brilliant weekend. I'm lucky to have a wonderful father-in-law and as it's Father's Day today I thought I'd share the card I made for him.

Pop up box card for a super dad

I've never made a pop up box card before but when I saw some free papers in Papercraft Inspirations Magazine issue 126 (click here http://www.papercraftinspirationsmagazine.co.uk/category/downloads/free-fathers-day-papers-issue-126.htm) I knew I wanted to make this sort of card for Paul with them. I downloaded them from the magazine's website (click on link) and printed them onto 300gsm cardstock. I then cut out the elements I wanted and then watched a video on YouTube on how to make a pop up box card https://www.youtube.com/watch?v=gK-eQNFGxKU. Following the instructions I made the basic box card and decorated each panel with one of the printed papers then chose the cut out elements I wanted to have springing out of the box and added them to the box parts inside using strips of acetate. This makes the elements appear to float out of the box. I embellished the front and side panels with the remaining cut out pieces. One of the best things about this card design is although it looks really solid it actually folds fairly flat and fits in an A5 envelope. Here are some more photos.

Close up of some of the pop up elements

Close up of front flap

Close up of side flap

Panel under the side flap

Back of the card ready to write on

Close up of other flap

Under the flap

Card folded flat ready for envelope

A super card for a super dad

I hope you like my latest creation, I really enjoyed making this card and I've a couple of ideas for different versions that I'd like to make including a butterfly version and a dolphin birthday card version for my sister-in-law, I've even ordered a couple of dolphin dies so I can make one :).

As always if you have any questions or comments please leave them in the usual places and I'll respond to them as soon as I can. Until next time - keep crafting!

Love and crafty hugs,


Sarah xxx

Monday 15 June 2015

Crudy Reshuffle Update and a card share

Hello crafty peeps and welcome to my crafty nook! I hope you've all had a good weekend, it's been raining and very cold here in Brid but it looks like it's going to be a beautiful day today. I haven't got as far along in my crudy reshuffle as I would like - to begin with I managed to drop a couple of 12" x 12" spiral bound scrapbooks on my foot at the beginning of last week and although it took 3 days for the bruising to show it's still quite painful and I can't wear shoes yet. That obviously slowed me down somewhat not least because I was scared of dropping more stuff on it as I was transporting everything out so moved things a lot more carefully than I normally would. Now to add injury to injury I've managed to strain my shoulder and can't raise the elbow to shoulder height without a great deal of pain. To be honest I'm not sure if I've done it lugging boxes around or if I've just slept in a funny angle, my cat Jinx often pins me down while I'm asleep and it's not unknown for me to wake up with my body contorted in various weird shapes because Jinx has wanted to sleep in just so a spot lol. Regardless of how it occurred it's slowing me down somewhat and I'll be glad when it eases up. I'm half wishing I'd not started it in the first place as the entire flat is a pig sty, I'm quite shocked at how much stuff has come out of such a tiny space and I just hope I can get it back in once the breakfast bar is moved into place.

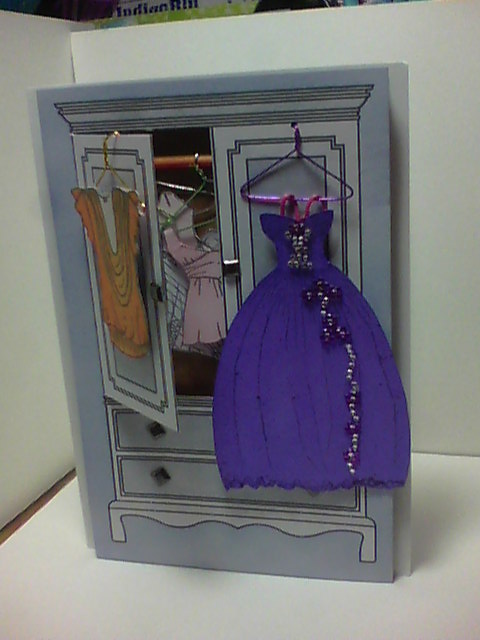
It's very frustrating having everything so disorganised, I really need to make a Father's Day card (have a great idea for one but can't either find or get to the supplies I need) and I was halfway through making a Prom card for my niece which I can't finish as I'm totally clueless to what I've done with the bits I'd already completed and the bits I need to do! I'm making her a card in the shape of a wardrobe using some printed toppers called "Grandma's Wardrobe" which I got from Every Craft's A Pound. They are uncoloured and have dots where the handles should be so you can personalise them and add brads or mini door handles on the drawers and wardrobe doors and I'm planning on cutting a flap on one side so it looks like an open door and having a rail inside with card clothes hanging off wire coat hangers. I've stamped and coloured all the clothes and stained a skewer to look like a rail so far, I've even decorated a long dress that looks a little like Charlie's Prom Dress although my version is a bit "My Fat Gypsy Wedding" compared with Charlie's actual dress and  I'm planning on hanging it on the outside of the closed wardrobe door - that is if I could find anything!

I did find enough supplies to make a card for the lovely Roxy who celebrated her birthday on Friday (I'm really hoping she got her card in time). 

Cupcake Card For Roxy
I recently found out that Roxy likes to bake and decorate cakes, I like to bake too although I'm not very good at it - the last cake I made set the oven on fire! - and I certainly give the decorating part a miss so I'm totally in awe of anyone who can make pretty cakes. I thought Roxy would like a cupcake themed card to celebrate both her birthday and her baking ability. To make this card I took a sheet of A4 cardstock and scored it at 1 1/2" and 3" and then folded the remainder of the card in half to make a card blank with a step at the front, I'm sure this sort of card has a special name but I don't know what it is but basically it's like a stepper card but with only one full length step and no cuts. I decorated the front panel using some Dovecraft Cupcake Boutique paper and decorated the front step panel using the matching washi tape in blue spots and stripes. The sentiment panel was stamped using the sentiments stamp set that's from the collection (it's the only stamp set of the collection that I have so far) and I decorated the ends using more washi tape and a couple of gems from the matching gems and pearls set. I wanted to keep the card fairly flat so just stuck this sentiment down to the back panel using wet glue. The cupcakes were made using a stamp set I got free with Simply Homemade Magazine last year which was called "Handmade Kitchen" and consisted of three stamps in total and 6 polka dot buttons. I stamped the cupcakes 4 times using a pigment ink (I should have used a different ink as this smudged a tiny bit but couldn't find any other) and coloured it in using my lovely W H Smiths watercolouring pencils - am I allowed to say that I'm rather proud of the cherries?? I think they look really glossy but that's just down to leaving a highlight spot on each one by not adding any colour, a trick I shall attempt to take with me for alcohol colouring! Once the cupcakes had been coloured and had dried completely, I fussy cut around them and added them to the front 'step' as shown. If I'd been able to find the supplies I would have added some clear Wink of Stella to the frosting and some Glossy Accents to the cherries to make them even more shiny. In case anyone was wondering how I got the cherries to be such an intense colour compared to the rest of the cupcakes, I coloured them by wetting the tip of the pencils and colouring directly onto the paper wetting the tip each time the colour changes from paint to pencil - this probably doesn't do your pencils a lot of good but does give you a really intense colour that just isn't possible by adding the water to the pencil coloured image. The 'paint' made by the water to tip method is opaque rather than the translucent paint you get using the normal method.


I hope you like my latest card, I shall add another post once my crudy is finished or by Friday at the latest as I really have to make the Father's Day card for my Dad-in-law. As always if you have any questions or comments then please leave them in the usual places. Until next time - keep crafting!

Love and crafty hugs,

Sarah xxxx

Monday 8 June 2015

Crafty update and a crudy reshuffle

hello crafty peeps and welcome to my crafty nook! As regular readers of this blog will know, we had our kitchen completely gutted and a new one put in a few months ago and it left me with a breakfast bar I'm reluctant to get rid of just because it cost more than I wanted to spend and I basically want to get my money's worth! This breakfast bar has been cluttering up my lounge for months and has ended up becoming a dumping ground for all the stuff that should have a home but for some reason don't. I finally had enough of trying to work around it so I've decided to dedicate this week to half emptying my crudy and finding a new home for the breakfast bar, this will probably mean I won't have a great deal of time for either crafting or blogging. I just wanted to let everyone know that I will be back to regular posts next week at the latest and to say sorry for not being around this week. I'd like to share my latest crafty buy, my lovely hubby passed on a £15 gift voucher for W H Smiths that he hadn't used and I put it towards a set of 36 watercolouring pencils in a wooden case and a pad of watercolouring paper that still has to arrive. The pencils are fantastic and unlike ones I've bought recently are actually water soluble!

A rainbow of colours

Art set includes sketch pad and pencil, two brushes and water bottle, sponge and tray

Here's my first picture - image from issue 1 Art Therapy.

First image coloured with new pencils
I can certainly see why adult colouring books have become increasingly popular, there is something deeply therapeutic about colouring in a repeating pattern - it gets you in the 'zone'. I'm looking forward to colouring these images from Art Therapy using my Promarkers however as the company who supplies Art Therapy is experiencing "distribution problems", I won't be able to colour them in any time soon. Although I'm a subscriber so far all I've been sent in two months is issue 1 without pencils, and issues 6 and 7. The pencils finally turned up a month after the first issue and I haven't had any of the subscription free gifts yet - to be honest I consider them to be in breach of contract and if I don't receive the missing issues soon and the free gifts I shall be reporting the situation to Trading Standards. I'm not the only person who has experienced rubbish service from Hachette Partworks.

Anyway mini rant over, as always if you have any questions or comments then please leave them in the ususal places and until next time - keep crafting!

Love and crafty hugs,


Sarah xxx

Thursday 4 June 2015

Tatty Twinkles Card

Hello crafty peeps and welcome to my crafty nook! I hope you are all well and enjoying the beautiful summery weather most of us seem to be having here in the UK. Today I'd like to share a card I made during the night (I couldn't sleep!) featuring the totally adorable Tatty Twinkles.

Tatty Twinkles Time Flies

I've had this stamp set for quite a while but it's the first time I've used it, I decided to do a bit of a stash raid and use some papers I've been hoarding for yonks. The base layer used a sheet of A4 cut down to 7.5" square and was taken from the Nancy Watt Collection called "Summer Ladies" that came free with Making Cards Magazine August 2012, I love the papers in this collection which is why I've not used them before now.  I'm starting to wonder if I should invest in a decent printer and start using craft CDs because I have a tendency to hoard the papers I like the most if I only have one set of them (my mind goes you've only got one sheet of that and if you use it on a card it'll be GONE!!!) I try to buy at least two sets of  papers so I can keep one set and use the other but I'm slowly running out of space to store them all and it seems a bit of a waste not to use them. The next two layers were taken from a HOTP sarabooks amethyst scrap kit that I've had at least 6 years and not really used and I used the scraps left from the layering to make the purple circle frame, butterflies, flourish and flower. The circle frame was made using a Bigz large circle die and the largest circle from Spellbinders Nestabilities circle dies which is smaller than the Bigz die. The butterflies were cut and embossed using a Sizzix Stampin' Up! Embosslits called "Beautiful Wings". The flourish was cut twice using a Crafts Too die and I flipped the flourish on the left so it mirrored the one on the right. The flower was made using the flower die that came free with Crafter's Companion Inspiration Magazine previously mentioned on this blog. I cut it twice using the dream paper and the shimmer paper and rubbed around the edges using a ball tool and embossing mat to shape the petals, I then layered them together and stuck them using Tattered Lace detail glue which I also used to stick down the frame, double flourish and butterflies - everything else was stuck down using Collall all purpose glue. The card base is a 8" scalloped square one taken from my stash. The Tatty Twinkles image was coloured in using a combination of Flexmarkers and Kaiserfusion markers.

As with most of my cards, this is quite a simple one but it's the first time I've attempted using a frame I've diecut myself and I'm rather pleased that I managed to get it even - I'm sure it's a lot easier to do with matching Nestabilities dies rather than cutting out using two different brands. The butterflies, flourishes and flower were embellished with purple gems.

Close up of topper


Close up of flower 


My lovely pack of goodies arrived on Tuesday and I'll be adding a post about what I got in the next few days. As always if you have any questions or comments please leave them in the usual places. Until next time - keep crafting!

Love and crafty hugs,

Sarah xxx