Translate

Saturday 29 August 2015

Circles easel card

Hello crafty peeps and welcome to my crafty nook! Have you got anything exciting planned for this bank holiday weekend? We haven't apart from going shopping first thing tomorrow morning in a bid to escape the worst of the day trippers. Bridlington is a wonderful place to live but in all honesty I prefer it when the summer holidays are over and it's not so crowded. I know Chris does too because not everyone is considerate or attentive enough to make allowances for his long white cane and he's forever apologising for other people bumping into him when really they should pay a little less attention to their phones and a little more to where they are going! Sorry mini rant over.

Well Done card for Ross

Say "Cheese!" 

Double layered banner easel stopper

I realised yesterday that I'd made a card for Charlie passing her G.C.S.E.s but not one for my sister's partner's son passing his second year of a three year course at college and felt a little guilty about it especially as he loves getting handmade cards from me. I couldn't think of what to make him but after seeing a circle easel card featured in a Sizzix programme on the new craft channel HOCHANDA, I decided to have a go at making one. Photography is part of the course that Ross has completed so I decided to use a Sizzix mini camera die and a star die (because he's a star for passing) also from Sizzix. I don't have many circle dies so I made the card blank and the topper part of  the easel with the biggest die I have which is a Sizzix Bigz 3" circle die, this is actually a good size to use as the camera and star diecuts are quite small. I also die cut a banner twice, once using holographic card and then using white card and I layered them together then popped them up on mini foam pads to make the easel stopper. I couldn't find a suitable well done or congratulations stamp so I used some W H Smiths rub on letters that I bought about 6 years ago. I even made a little smiley face emoticon out of the punctuation. I added some star stickers and peel offs as shown as it looked a bit bare without them. I think it would benefit from a thin holographic frame but it's too late to add it now as everything is well stuck down.

I hope you like this quick card, it wasn't as difficult as I'd expected it to be so I'd like to have another go soon. I've been a bit naughty and ordered a couple of packs of Action Wobblers from Amazon, they have to be shipped from the USA so I won't get them for a while but I'm really excited about experimenting with them. I'm hoping they come by the earliest arrival date which is Friday 11th September and not the last date 1st October as I'd love to use one as part of my POTY entry, they are so fun and quirky and they just might help my entry stick out that bit more ;). As always if you have any comments or questions please leave them in the usual places. Enjoy your bank holiday weekend and until next time - keep crafting!

Love and crafty hugs,

Sarah xxx

Thursday 27 August 2015

{Chris} You Complete Me Anniversary card

Hello crafty peeps and welcome to my crafty nook. I hope you're having a brilliant week, mine's been rather mixed but the highs have outweighed the lows which is always good. I've had a couple of orders arrive including 3 Sheena Douglass stamp sets from Create and Craft, I've wanted these particular ones for a while as they are fantasy stamps featuring an angel, a city in the cloud with planets and a phoenix. I'm hoping I'll use them and not just look at them. My second order came today from Crafter's Companion which was a bit of a shock as I only got the email saying it'd be delivered in 3 - 5 days this morning! CC have been celebrating the 8th birthday of CC USA last week and had free P&P plus a load of special offers, I also had £10 off if I spent £30 or more after they took ages sending out a previous order (wasn't much quicker than this order if I'm honest!) I put all these elements into good use and bought some items I normally wouldn't go for due to price etc. Annoyingly a lot of the items I wanted weren't in stock but it's impossible to tell until you try to add the item into your basket, then you have to mess around to get back to where you were - I wish they'd remove the items they can't actually sell instead of cluttering up the website and getting crafter's (well my) hopes up! I did get a distress ink in antique linen which I've wanted for a while and a couple of embossing folders that are lovely. Also got some Fran-tage crushed glass glitter in Champagne, I wanted clear but that was one of the non available items so this champagne colour was my next choice. One of the biggest items in my order was a Die'sire Christmas Fancy Edge-ables. I have that much Christmas stash (and it's growing thanks to the free gifts with magazines) that I'm a bit leery about buying more but this one is called Twinkle Twinkle and is stars - you can use stars all year round! I also bought 4 packs of Snow White Centura Pearl card stock that was supposedly a multibuy but I've a feeling I was charged full price, I'm not sure if that's because I got two packs of the hint of silver and two packs of the hint of gold instead of 4 of the same shade or if it's just the website messing around. Having the £10 money off voucher means I pretty much got the die for free - which is nice!

It's hubby and I's 4th wedding anniversary on the 11th September so I decided to get ahead of the game and make his card. The theme of the challenge on Passion for Promarkers this week is animals and it can be found here if you'd like to join in http://promarkerchallenge.blogspot.co.uk/2015/08/week-311animals.html. I found a really sweet stamp set in my stash that I've had for years called Country Companions "Lover Lane" with cute little hedgehogs and tiny ladybirds. I decided to combine making a card for the challenge with the anniversary card for my lovely husband. One of my husband's pet sayings is "You complete me!" so I was thrilled to discover this sentiment on a Crafter's Companion Sentimentals stamp set, in fact it's the main reason I bought the sentiment set.

jigsaw easel card

Close up of main image

Happy Anniversary easel stopper

Hedgehog Jigsaw Card

For Chris x
The hedgehogs were stamped first in Memento Tuxedo Black dye ink then masked off with post-it mask, the bench was then stamped over the mask with the same ink so it looks like the hedgehogs are sitting on the bench. I added the smaller stamped images and coloured them in with Flexmarkers. I stamped the little sign again using a scrap of card and cut it out. Once the image was coloured in I put it in an embossing folder by Darice called "Jigsaw" but upside down so the image was debossed rather than embossed once I'd run it through my Big Shot. I followed the lines with a silver gel ink pen and added the "You Complete Me" sentiment and the cut out sign which is raised on a foam pad. The jigsaw piece was matted on silver pearl card and added to a panel of decorative paper, which was also matted onto the silver pearl card. I made a square easel card and added the front panel as shown. I made a simple stopper out of more card, paper and a sentiment. I punched out two jigsaw pieces out of decorative paper using a Xcut punch. This is a simple card but one with a lot of texture - as I've probably mentioned before I like to use embossing folders on my cards so Chris can at least feel it if he can't actually see it.

I really enjoyed making this card and I'm sure Chris is going to love it! If you have any comments or questions then please leave them in the usual places. I shall be working on my POTY entry but hopefully I'll have some cards etc to share with you soon - I really should start working on Christmas cards and gifts. I hope you all have a wonderful bank holiday weekend, Every Craft's A Pound is having free P&P on orders over £30 so it's a great time to check them out here www.everycraftsapound.co.uk. Until next time - keep crafting!

Love and crafty hugs,

Sarah xxx

Monday 24 August 2015

Boxy Lady lol

Hello crafty peeps and welcome to my crafty nook! I hope you've all had a brilliant weekend, I haven't done a lot of crafting, I think I'm a bit burnt out from getting my NCOTY entry finished as my craft mojo has gone south again, but like most things in life the best way to deal with it is to try, try and try again so I'll be in the crudy once this post is written. It's our wedding anniversary on the 11/9/15 so I need to make a card for that, I've got an idea for it I just need to work out the details. My entry for NCOTY may be safely on it's way (hopefully there by now) but I've got POTY (Papercrafter of the Year) to work on next. If you are a loyal reader, you may recall last year's entries which included a Gorjuss birthday book/calendar for the non card element of the entry. I'm planning to try something completely different this year which I'm not going to share in case I mess it up lol - it's a new craft for me personally so I'm not sure how good it's going to be. I know it's kind of risky to try a new craft rather than one I'm familiar with but the truth is apart from the odd paper project I mainly make cards so any project I submit is going to be new territory anyway and I may as well try one I'm passionate about. Plus learning a new skill is one of the reasons I love crafting so much. Closing date for POTY is the 12th November 2015 and like the NCOTY comp I want to get my entry in early. One of the reasons for this is they'll probably be a third comp (can't remember what it's called though!) with a closing date a week later if last year is anything to go by. At one point last year, I had three entries all on the go which was tremendous pressure (a bit like when I was trying to pack my old flat up, plan a wedding and make regular trips across to see my husband to be - I nearly had a meltdown!) By being super organised I've already completed and sent one entry off, if I can continue to do this it'll mean that the final competition will get the same level of care and attention that the first two receive. I sometimes worry that my final entry isn't as polished as the first two because not only am I usually chasing deadlines but trying to get Christmas cards and handmade gifts made too. Let's hope I've finally learnt my lesson :).

I thought I'd share a couple of box cards that I've made recently, as you can probably tell I'm really into making them at the moment.

A Fine Gentleman themed box card

I'm late - I really moustache! 
This is the box card I made for my husband's birthday - I have been threatening to make him a rabbit gardening card but relented and made him one I thought he'd like. Chris chose the embossing folder for me to use (Sizzix hexagons) and I teamed it with some First Editions dies called "Vintage Gentleman". You can't really see in these photos but I replaced the lenses in the glasses with some card covered in holographic film, the effect is rather psychedelic and a bit steampunky. I added strips of holographic card to behind the hats so it shows through the die cut ribbon band. I wanted a lot of texture for this card and the hexagon embossed holographic card works perfectly - it kind of reminds me of a Tom Baker era TARDIS interior (the Horror channel have been re-running the vintage Doctor Who series). Chris loves his card and I've got to say it's one of my favourites! (Mind you my last card is always my favourite lol).

You're a star, Charlie card

Star box card for my amazing niece

My second box card is one I made before the birthday card and it's for my wonderful niece Charlie. She got her GCSE results last week and I wanted to make her a card expressing how proud of her I am. I've recently got a order from Sizzix and there were two different sized star dies included. I think Charlie is a real star so I thought this card would be a perfect way to show her how I feel. Unfortunately the sentiment is a little crooked, I made it while I had a poorly eye and I think my judgement was a little off (if this is anything to go by!) still it's the little imperfections that show it's handcrafted. She hasn't got the card yet as it's rather bulky and needs to go to the post office first but I wanted to add it to the first card.

I hope you've enjoyed my little card share, I love the box cards at the moment so you'll have to endure a few more before I find my next fad lol. I'm even considering doing another vintage gentleman themed one for POTY but I'll need to think things through before I decide. As always if you have any comments or questions then please leave them in the usual places. Until next time - keep crafting!

Love and crafty hugs,

Sarah xxx

Friday 21 August 2015

100 posts and counting...

Hello crafty peeps and welcome to my crafty corner! It's a very exciting day for me because not only is this post my 100th since I started up my blog last August but it's also my wonderful husband's birthday.

I wanted the 100th post to be a bit special and what could be more special then finally sharing my entry to the National Cardmaker of the Year 2015 competition (did I hear someone shout blog candy?!? Maybe when I have a few more subbies - post 150 perhaps? lol I don't mean more than 150 subbies btw, just for the 150th post assuming more people subscribe.) Anyway enough with the blog candy heckling - I can't really hear you *big grin*. - here are my three cards for the competition.

How could I resist making yet another box card *big grin*

Close up of the floating toppers
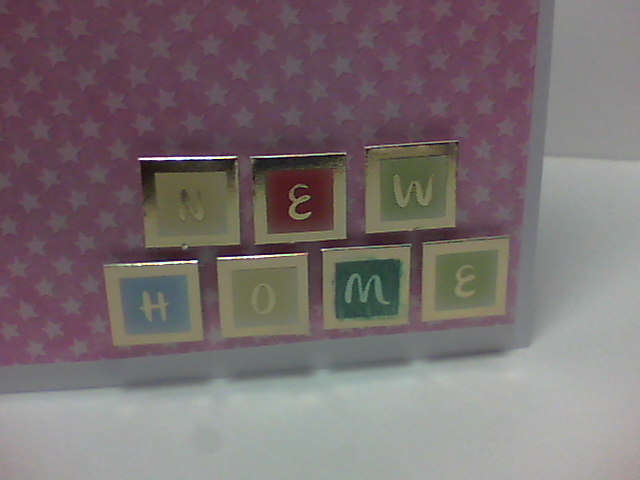
As you may have noticed, I adore the current trend for pop up box cards, whoever came up with it is a genius! I love the fact you can make the basic card blank using a single sheet of A4 card, it folds flat for easy/cheaper posting and it can be as simple or ornate as you want - basically how you decorate it is up to you and it's a great way to use those small toppers that you've had for years (though I tend to make my own). The first baby box card I made got such a positive response that I wanted to make another one but for a girl this time. The comp rules state that all cards submitted should be different but if I'm recalling it correctly, a significant number of the runners up cards had a theme to them, usually a paper collection had been used in all three cards or they had lots of similar die cuts so I wanted to have a sort of informal theme running through while sticking to the rules by each one being a stand alone entry. To try and achieve this aim, I decided to make cards for non adults i.e. a New Baby Girl, a young boy (ages 2 - 12 ish) and a card for a teenage girl.

Scruffy Little Kitten "Freddie" Dino Card

Close up of stamped topper and don't you just love the enamel dots!!

Inside of "Freddie" card, image stamped with London Fog Ink
My second card features the adorable "Freddie" stamped image from the Crafter's Companion range - Scruffy Little Kitten. At first I was a bit disturbed by the lack of noses on these follow up stamps to the very popular Scruffy Little Cat range (who all have noses btw), but I've grown to love these images especially Freddie. I don't own all the collection yet but have got all but two of the little boy images mainly because even though I have young nephews I don't own many little boy stamps. I think this image will appeal to young boys and the not so young as I'm sure many of them remember pretending to be a dinosaur at some point even if they didn't have such a splendid costume. I wouldn't be surprised if a few 'grown up' boys still do pretend lol.

Santoro's Simply Gorjuss "Dear Alice" In Wonderland inspired Central Step Card

Close up of "Dear Alice"

Close up of X Cut Pocket Watch Die cut element with foam roses

Close up of left hand panels with painted foam roses and mini playing cards

Close up of right hand panels with mini playing cards, pocket watch and painted roses

Close up of lower half of card with ruby and clear gem detail

the whole card (again!)
First of all please excuse the vast number of photos of this final card, it's my favourite and has a lot of detail to it. This year is the 150th anniversary of the publication of "Alice in Wonderland" and I really like Santoro's take on the book through their fairly recent Simply Gorjuss stamp release. I am a huge fan of these stamps and indeed I like the Mirabelle and Willow ranges too. If I'd owned the Willow range I would be sharing a totally different card because I was a bit worried that the Simply Gorjuss stamps are a bit childish for a teenager, however although the image has childish elements (the teddy for example) I don't think the over all feel to the card is childish. I made the central stepper card from an 8" x 8" card blank and I've given it a twist on the usual central stepper card. I've not seen one as big as this (I had to make a box to put it in) and I've never seen a stepper with the angled panels at the top before. That's not to say someone hasn't already come up with this variation I've just not seen it before. I'll be totally honest, I have a real problem making stepper cards no matter how carefully I measure, score and cut I can't seem to get the steps even. This variation is extremely easy to make and requires very little scoring and cutting. The cutting is the hardest part to do because due to the size of the card blank (16" long when opened flat), the trimmer blade had to go through two layers of card and the back piece is a little ragged. I didn't do it myself but it would be easy enough to just add backing papers to it like the front. I'm not going to go into any more detail about how this card was made because this post is already very long, but as I really enjoyed making it I'll probably be making a similar one at a later date and I will give the instructions on how to make it then (I'm sure you crafty peeps will probably be able to work it for yourself anyway).

Thank you for sticking with me and reading to the end of the post and thank you for making it worth my while to keep blogging. I've enjoyed writing and sharing every one of the 100 posts to date and look forward to sharing many more in the future. As always if you have any questions or comments please leave them in the usual places and until next time - keep crafting!

Love and crafty hugs,

Sarah xxxx

Wednesday 19 August 2015

Entry for Passion for Promarkers Blog Challenge

Hello crafty peeps and welcome to my crafty nook! I hope you are all well, I've recovered from the mystery virus that laid me low last week but now have an eye infection which is preventing me from getting any sleep at the moment (I'll be mainlining coffee all day lol). It seems daft that such a small thing like an eye infection can stop me sleeping but it is really painful and if I catch it on my pillow (or accidentally poking myself in the eye as I did earlier!) then the pain wakes me up again. I've given it up as a bad job mainly because I kept my lovely hubby awake for two hours after he came to bed. Instead of just reading in the living room I decided to do some quiet crafting in my crudy and followed the card sketch on the Passion for Promarkers blog challenge. It's only the second time I've seen a sketch featured and as I had quite a few leftovers from my National Cardmaker of the Year Comp entry I decided to use them up to make a card based on the sketch, which can be found here: http://promarkerchallenge.blogspot.co.uk/2015/08/week-310sketch.html .


Challenge 310 - sketch

Isn't this a great sketch? I love the fact it's quite simple and as long as you keep to the layers and the layout, you're allowed to use different shapes etc. Here is my interpretation of it which sticks fairly close to the sketch.

Scruffy Little Kitten "Freddie" stamped image card
I made these Polaroid 'photos' for one of my card entries but ended up not using them, the die is a Sizzix one called "I heart this" and I backed it with black card. The photo part was stamped using Tuxedo Black Memento Ink and coloured using Blue Grey Flexmarkers 1 - 5 to give a black and white photo appearance, it's a technique I love doing but one I don't use very often. I coloured the photo frame using Herb Green Flexmarker and used the same colour to cover the die cut circle, this circle is actually part of a pocket watch die from X Cut called Chronology Pocket Watches, I've not purchased X Cut Dies before but I'm VERY impressed. Even though my Big Shot is pretty much kaput these dies cut like a dream and only need one pass under the rollers, with other brands I've had to do multiple passes moving the die and card to different parts of the cutting plate. Admittedly this is a very simple shape but even the more complex part of the pocket watches cut out beautifully.I turned the bottom decorative layer into a pocket and added another 'photo'.

Photo out of the pocket!
The outer part of the Polaroid was actually cut from Tesco Kid's card - I bought this quite a few years ago reduced and I'm kicking myself for not stocking up as they don't sell it any more at least not at my local branch. It's hard to see the design but it's leaves a bit like a cheese plant and I thought it seemed appropriate for a dinosaur. The same card pack also had a couple of sheets of scaley card and I filled the die cut letters on this second photo with the bits from a frame cut out of the scaley cards. The hearts were originally white but I coloured them with a red flexmarker - I think it was Molten Red. The backing papers were scrapbook papers left over from other projects and I've no idea where the raffia string came from, I just found it in my drawer. The layered panel was adhered onto a 6.5" square card blank that I made out of kraft card. It's actually white on the other side. The top photo is only adhered on the lower half of it so the photo behind can be removed - this pocket would also be good for adding a gift card or secret message. Here are a couple more photos.


Greyscale Polaroid  'photo'

Top Polaroid 'photo'

I {HEART} This

I hope you like my latest creation, I really enjoyed following the sketch and it was a great way to use up some pre-coloured images from my stash and leftover scrap book papers. My lovely hubby has offered to take my package of cards to the post office tomorrow so all being well I should be sharing them on this blog by the weekend. It's my beloved's birthday on Friday so I'll also have his card to share in the next couple of days. As always I'd love to see your comments, questions etc so please leave them in the usual places. Until next time - keep crafting!

Love and crafty hugs,

Sarah xxx

Sunday 16 August 2015

A small card share

Hello crafty peeps and welcome to my crafty nook! I hope you are all well and having a fantastic weekend. I'm not feeling too good at the moment so I've not been in a very crafty frame of mind. However I did manage to drag myself to the crudy and make a couple of cards in the last couple of days. The first card I'd like to share is a box card for my lovely niece Bethany who celebrated her 6th birthday yesterday (Saturday 15th).

A zoo in a box!

Lions and Zebras and Bears oh my!
I got given these glittered stickers years ago and even though I really like them I've never got around to using them apart from the odd one. The stickers are translucent and obviously if I used them as they are they'd stick to each other so I mounted them on white card and fussy cut around them. I did the rabbit first but didn't like how it looked so left a slight white border around the other images. I made the box card in the usual way and added panels of DCWV scrapbook cardstock. I'm afraid I can't remember the name of the stack but all the card/paper in it is green and it's at least two years old. I won two lots of DCWV scrapbook 12" x 12" paper stacks from card making competitions a couple of years ago and I have them stored in a cupboard with limited access, I just take the designs I like most out every now and again and have them in plastic storage bags near my desk. I shall try to write down the names of the stacks the papers come from in future. I used some packaging to make the acetate part of the card which is a bit stiffer than what I normally use so the card doesn't jiggle as much as usual. The round birthday sentiment was a freebie from one of the magazines I subscribe to from ages ago.

New Home Tree House card

Close up of Hunkydory topper

Letter Tiles - M coloured with ProMarkers
Due to not feeling very well I kept this new home card for my sister-in-law very simple and actually resorted to a card kit. I used to get the Hunkydory Magazine from my local craft shop but they no longer sell it and every issue came with a "free" card making kit featuring Adorable Scoreable card and toppers. If I'm honest although I admired the designs I very rarely used them because I prefer to make my own toppers etc with stamps and die cuts so I have loads of the free packs in a box file. This design was one of them. The tree house reminds me of the magic faraway tree from the books by Enid Blyton and as Susan has three beautiful girls (two at the right age to fall in love with old Moonface etc) I thought this topper would be perfect to welcome them to their new home. I added some Dovecraft glitter glue to the main topper to give it some sparkle and changed the colour of the 'm' in the sentiment because I'd got three identical colours in a row if I left it uncoloured.

I hope you like my latest creations, hopefully I'll perk up soon and have some more projects to share. If you have any questions, comments etc then please leave them in the usual places. Until next time - keep crafting!

Love and crafty hugs,

Sarah xxx

Monday 10 August 2015

Happy News and other stuff

Hello crafty peeps and welcome to my crafty nook! Things are rather chaotic at the moment as we've my sister-in-law's cat staying with us for a few weeks while she gets her new house sorted out. I love cats but Treacle is rather challenging to say the least as she growls and scratches anyone who goes near her. She shredded my hands this morning when I tried to put Frontline on her (don't want little visitors of the jumping kind) so she's not exactly my most favourite animal at the moment!

 I hope you've all had a brilliant weekend, I had a fantastic Saturday filled with happy mail :) I got three of the magazines I subscribe to and a Tatty Twinkles kit from Create and Craft that my lovely hubby treated me to just because (isn't he lovely?) I liked all the stamps in the USA collection to some degree but didn't think I'd get much use out of the military set or the one with an army Tatty so went for the last set which features a Cheerleader and Tatty with mouse ears on. Bethany has started doing Majorettes along with her older sister Millie so I can see the cheerleader being used a lot and my mum-in-law and an auntie on my hubby's side of the family both love either mice or Minnie so again I can see myself using this stamp set a lot. It came with 10 sheets of stamp card (A4 size) and a My Craft Studio CD ROM that matches the stamps. I'm not a huge fan of digital crafting but there didn't seem to be a way to buy the stamps without the CD and I'm sure I'll use it at some point - who know it may even convert me to digital crafting!

One of the things that made my Saturday even better was when I started to read the magazine I saw this in Simply Cards and Papercraft Magazine.

My cards and email on the letter page!
As you can see from the caption on the above photo, my email and photos of the cards I made using last month's free gift appeared in the letter page of the magazine! Not sure if I'll get a prize like it says on the header of the letter page as I didn't include my home address but I'm thrilled just to see my cards in the magazine. I've had quite a few appear on the Reader's Galleries in magazines and of course I had my card appear in Quick Cards Made Easy but this is the first time I've had a letter printed. It gave me a very happy glow that even Treacle couldn't spoil lol.

My eldest nephew Chris has passed his driving test so I've sent him a card to congratulate him.

New Driver card for my nephew
I did make a card for Chris a while ago but put it in a safe place so of course I haven't a clue where it is now. I coloured a Dimension forth stamped image using Flexmarkers and added glossy accents to the indicator lights and the double headlights. It's rather a simple card but I didn't have a lot of time to make it as I wanted him to get it as soon as possible.

Cardmaker of the Year 2015 update - I've finished my second card and I'm really pleased with it, I'm not going to put them on my blog until I've send them off (hopefully next week). The first two were relatively easy because I knew sort of what I wanted to achieve, it just me a long time as I either re-jigged it or made new versions of it until I had exactly what I'd envisioned. However the only thing I know about my third card is I want it to be suitable for a teenage girl. Although each card is completely different I wanted a sort of theme to link them so my first card is a New Baby card, the second is one for a little boy (ages 5-10) so the natural progression is a teenage girl card (girl, boy, girl). It's quite hard to decide what to do though, Tatty Twinkles seems a bit babyish for a teen (yet for some reason it's great for women!), Santoro Gorguss Girls again are probably a bit too young for a teen and Scruffy Little Kitchen -pmsl!!! make that Scruffy Little Kitten not kitchen! - is a bit too sexualised for a teen though there are a couple of demure images in the stamps I have. I think the Santoro Willow stamps would be perfect but I don't have any yet and as I want to get the card made and sent by next week I'm not sure it's feasible to order some to use. The first two cards have stamped images so maybe I should make a card without any stamped images just shapes or something? Argh sometimes you can have too much of a good thing! Anyway enough thinking out aloud, I'll share the cards I come up with once they are made so in the meantime if you have any questions comments or helpful tips on how to apply Frontline on a demented cat then please leave them in the usual places. Until next time  - keep crafting!

Love and crafty hugs,

Sarah xxx

Thursday 6 August 2015

Look what I've made!

Hello crafty peeps and welcome to my crafty nook! I hope you are all well and enjoying the summer. I've been busy in my crudy the last few weeks which is why I've not posted for a while, I'm sorry if you've missed my usual updates but hopefully I should get back to posting on a more regular basis after the 18th August. As you will know from previous posts its Cardmaker of the Year time and even though the closing date for the competition is the 18th September 2015 I want to send my entry as early as possible so have set myself a deadline of 18th August 2015 to make them and get them ready for posting. Of course because I've set myself a deadline I'm having a bit of a craft block so I've spent hours in the crudy with very little to show for it (I have made a card for my nephew though - his birthday isn't until the 29th of December!) My 'beloved' cat hasn't been a great help either as he's decided the breakfast bar in the crudy is now his and insists on sleeping on it when I'm trying to work. I can't even shut him out as he's worked out how to pull the door handle down then he pushes the door open and jumps in before I even get off my chair! I haven't finished any cards apart from the one for my nephew but I have made myself a stamp press. I've wanted one for years but as they start at £12.94 on Amazon for a Fiskars large stamp press I've been really reluctant to buy one as it's basically just a thin sheet of clear plastic with sponge feet and I think nearly £13 is a lot of money for a piece of plastic. However a couple of months ago I ordered some generic replacement plates for my Big Shot off Ebay for £5 (I think) which due to the fact my Big Shot is pretty much kaput didn't work in the machine. I couldn't be bothered to send them back especially as it wasn't the seller's fault but down to the fact my rollers are ruined after two years of needing replacement cutting plates, so I just put them to one side hoping I could get my hands on a new Big Shot at some point in the future and use them as intended. The other day I was watching YouTube and saw someone who'd made her own out of a sheet of clear plastic and some make up sponges, I'm really sorry to say I can't remember who I was watching but she didn't show how to make one just mentioned that she'd made a stamp press out of the aforementioned items. You can imagine my excitement when I remembered my spare plates and the fact I'd bought a huge bag of make up sponges from Poundland when my niece came to stay a few months back. When I got the stuff together I realised I'd actually stored some Avon Nail Art sponges in the bag of cosmetic sponges and as there were four spare ones I decided to use them as the stamp press feet. I made the mistake of using clear 3D pearl effects as the adhesive as usually it sticks everything with a bond that can't be beat but because the sponges are very porous the glue just soaked into the sponges and they slid off when I picked the stamp press up even though they'd been drying for an hour. Unfortunately the glue pretty much dried instantly onto the plastic and it won't come off so the plate looks a bit messy. I washed all the glue out of the sponges (absolutely loads of it!) and stuck them down to the plastic plate with hot glue once the sponges had dried. Some of my stamps are thicker than others so I cut a thick round cosmetic sponge into four and stuck that onto the reverse side of the stamp press using the hot glue. This makes my homemade stamp press a lot more versatile than just having one depth of sponge feet.

My homemade stamp press

Two different sized sponge feet for different thickness of stamps

I've probably saved at least half of what it would cost me to buy a Fiskars stamp press and I have the satisfaction of knowing I made it myself using items I already had in for other purposes or that I couldn't use at this particular time anyway so were just cluttering up my already cluttered crudy. Admittedly the Fiskars stamp press has a grid etched into it to make it easier to line up stamps but I've managed without a grid for lining up stamps for nearly 15 years so it can't make that much of a difference to crafting. I've tried it out with a A6 sized stamp from Heartfelt Creations that I really love but haven't used much as it didn't stamp cleanly in the past but using the stamp press makes using big stamps really easy.

Iris Stamped Image

Close up of verse

I inked the stamp up with the new Tim Holtz Distress Ink in Blueprint Sketch - I think it's probably my favourite colour apart from Peacock Feathers which I really love, and I coloured it in using more of the Blueprint Sketch ink and an empty clear Wink of Stella brush marker filled with water. I used cracked Pistachio ink (another new colour - Craft Stash were offering the latest 7 Distress Inks for only £14.99, it cost me £4.75 just for one a few months ago!) to colour the leaves of the irises. I am incredibly proud of this panel as it's the best watercolouring I've ever done and it's really shimmery in real life because an empty Wink of Stella is never truly empty when the liquid runs out so using it as a water brush (another item that can be expensive) means that not only are you helping the environment by upcycling the pen but you are getting shimmer paints using ordinary inks or water colour paints. 

I hope you've enjoyed seeing my latest project and I hope it inspires you to make your own. I'm sure you could get sheets of thick plastic even cheaper than what I paid and if you can't get nail art sponges then thick make up sponges will do just as well though some of the thicker cling mount stamps may be too thick for the sponge to actually press. I haven't tried it myself but doubling up the make up sponges and gluing them together might work too but I'd recommend testing it's sponginess before gluing onto the plastic because if the doubled sponge doesn't compress enough the inked stamp won't reach the paper or may stamp unevenly.  Let me know if you make your own and leave a link in the comments section so I can come and take a look. As always if you have any questions or comments then please leave them in the usual places. I hope to have some cards to share with you soon. I have three birthdays coming up this month so I'll post the cards I make on here once it's the birthday concerned and hopefully I'll have some other cards and projects to share with you soon, until then - keep crafting!

Love and crafty hugs,

Sarah xxx