Translate

Friday 21 October 2016

Charlie's Cards (a little later than planned - sorry)

Hello crafty peeps and welcome to my crafty nook! I hope you are all well and looking forward to another crafty (or non-crafty) weekend. This post is a little later than promised, I'm not sure where this week's gone again.

I made two cards for Charlie - the first card was loosely based on one my sister shared with me on Facebook months ago, I couldn't actually find the photo of the card but had sort of an idea what it looked like.


This isn't the easiest card to photograph as it's mostly black on black. I stuck Sizzix number dies onto a piece of Centura Pearl card stock in a random pattern using washi tape and ran it through my Big Shot using a metal Precision adapter plate to ensure a crisp clean cut first time, then moved some of the numbers on the card while leaving a couple off. I made sure I kept the negative pieces of the numbers as I wanted to make a feature of the negative numbers rather than the die cut positive numbers. Once I had all the numbers I wanted cut out I added pieces of foam tape to the back of the card making sure I used plenty near but not covering the negative number spaces. I added a small scrap of pink holographic card to the 18, flipped the card over and added the interior negative pieces so the 8 was complete using small pieces of foam tape. I added some d/s tape to the back of the 18 and added the entire panel to another piece of black card stock. I added all the saved negative diecuts inside of the relative numbers as shown using more foam tape. I wanted to add some white splatters just to make the card a little more interesting so mixed a small quantity of Tonic Nuvo white acrylic paint with some DoCrafts white shimmer spray on a spare piece of acetate and flicked it onto the card front using a paint brush. I ended up with two large drops so dabbed them up using a piece of kitchen paper and it left a galaxy sort of pattern near the 18 which I rather liked. I added to the spacey feel by adding dots of white gel pen and Sakura Clear Stardust gel pen randomly to the card. It would have been a good idea to have added the Happy Birthday sentiment before I added any foam tape to the piece but luckily it was stable enough for me to stamp onto it using Versamark clear ink and then heat embossing using a detail white embossing powder. Once I was happy with the front panel, I added it to a card blank. Although this was made for a young lady it would be very easy to change it for a young man just by swapping the pink card under the 18 for another colour - you could also easily change the age for a different significant birthday.

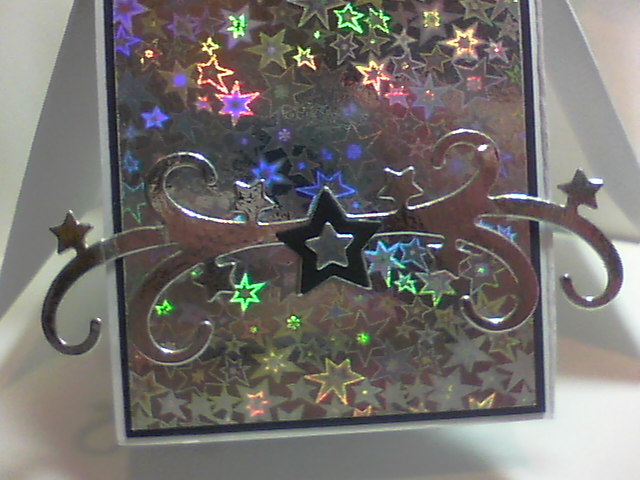
The second card is one of my beloved pop up box cards and I loved making the last one so much that I decided to make a similar one using different star dies.


The card base was made using Centura Pearl black card stock which is black on one side and white on the other which is why the top flaps of the box card are white while the box parts are black. I die cut the star shapes out of the black card, pink holographic and silver mirror card and the 18s were also die cut out of the pink holographic card. This card was extra large so I had to make a custom envelope for it using my WRMK Envelope Punch Board and a sheet of 12" x 12" paper (punched and scored at 4 1/2 ")  I really liked making this card and it certainly has that wow factor.

I've made these box cards loads of times so there are instructions somewhere on this blog. If you can't find them then please leave a comment below and I'd be delighted to write them out again. I've a card to make for one of my other niece's Isobel who will be celebrating her 2nd birthday on Thursday. I'm considering making a rocker card with balloons floating above using acetate but nothing's definite at this point. I hope you've enjoying seeing my (sort of) latest creations, I had a lot of fun making them and they seemed to go down well last Sunday. It was really wonderful to share Charlie's special birthday and it was fantastic to see my sister's family and spend some quality time with them.

I hope you all have a brilliant weekend and until next time - keep crafting!

Love and crafty hugs,

Sarah xxx


Sunday 16 October 2016

Happy 18th Birthday Charlie and some spooky milk cartons

Hello crafty peeps and welcome to my crafty nook! Today is a very special day as my niece Charlie turns 18! I don't see my sister and her kids as often as I'd like so I'm making the most out of seeing them today by taking an early Halloween treat for her kids that still live at home. I fell in love with the milk carton embossing board that came free with one of my magazines last year so I decided to get it out again and make some spooky milk cartons filled with Halloween treats. I don't celebrate Halloween so apart from one stamp set that I bought during a Clearly Besotted Stamps sale and a skeleton die from Crafters' Companion, I don't own a  lot in the theme of Halloween. Luckily I do have lots of different coloured card stock and I must confess to a sneaky purchase on ebay of a spider web die, so with a little imagination I've come up with these.


All the milk cartons are a variation of the theme but I did change things a little bit more for the birthday girl - I used Centura Pearl card and black fabric glitter tape for that added bit of bling and embossed the scary face and BOO! using white detailed embossing powder instead of stamping in black. I coloured the tiny skull pegs using a black flexmarker and added details (stripes and dots) using a white gel pen. Since taking the photos I have coloured in the naked skull peg to match the others. I added some cheap pearl effects which actually flattened out instead of staying 3D (lesson learnt!) but apart from that, I'm pleased with how they've come out. Hopefully the kids will like them as much as I did making them.

I've made a couple of cards for Charlie which I'll be sharing with you tomorrow all being well - I want the birthday girl to see the cards first. As always if you have any questions or comments then please leave them in the usual places. I hope you all have a wonderful Sunday. Until next time - keep crafting!

Love and crafty hugs,

Sarah xxx

Thursday 6 October 2016

60th Pop Up Box Card

Hello crafty peeps and welcome to my crafty nook! I hope you're all having a brilliant week, it's nearly the weekend so that means lots of crafty goodness to look forward to. I had my best friend Adam and his lovely wife Victoria stop by for a visit on Monday on the way to celebrate Adam's mum's 60th birthday. Perfect timing as it meant I could get Adam to hand deliver the card I'd made for her rather than sending it through the post. For such a significant birthday I decided to make one of my favourite styles of card - a pop up box card. Ros is such a star that it seemed appropriate to make her a box full of them with die cut 60s floating amongst them.


I used a set of star dies from Xcut which I got in a recent order from Every Craft's A Pound. ECAP have got a shiny new website with lots of new features and although not all items are just a pound, they remain fantastic value not least as you now get free P&P on orders over £30. This die set was only £3.00. The numbers were cut out using a die from Sizzix which didn't come from ECAP - unfortunately. I die cut the stars out of black card and silver mirror card and the numbers were diecut out of holographic card. The top flaps of the box were matted and layered using the black card and some rather lush holographic stars card which went perfectly with the star theme. The sides of the box under the flaps were matted and layered with black card and plain silver card except for the front panel which had white card for the top layer so I could write my birthday message.

Apparently there's a trick to make the box pop open as soon as it comes out of the envelope involving a rubber band but I've not come across instructions on how to get it to work. If I find them or manage to work out how to do it on my own then I'll share it here on my blog.

My next big event is my niece Charlie's 18th birthday on the 16th - I can't believe she's an adult, it doesn't feel like five minutes since she was flashing her bum at the security cameras at the local bank (she was only a toddler at the time I should point out!) For years I waited for it to appear on "You've Been Framed" (I've never done a search on YouTube though!!) but luckily it hasn't so far. Enough of niece bashing (lol) I'm thinking about making a similar sort of card for Charlie but with 18s instead of 60s. I don't usually get the opportunity to see my sister's kids on their birthdays so try to keep their cards postable (if you know what I mean), as I'll be seeing Charlie on her birthday, I'll be able to make her card as bulky as I want without worrying about how much it'll cost to send or it getting damaged in the post. It gives me lots of options on what sort of card to make so I may make several versions on the run up to her birthday.

I hope you like my latest make, as always if you have any questions or comments then please leave them in the usual places. I hope you all have abrilliant weekend and until next time - keep crafting!

Love and crafty hugs,

Sarah xxx