Translate

Tuesday 30 January 2018

Blog Challenge!!! UPDATED.

Hello crafty peeps and welcome to my crafty nook! I hope you are all having a good week and if not don't worry it'll soon be the weekend. Michele and I would like to invite you to join in with our blog challenge - we've had a long break so thought it time to start challenging each other and you to dig deep in our stashes and make some cards/projects! This month we've decided to use the gift that's free with issue 173 of Simply Cards & Papercrafts magazine which is currently in the shops priced £5.99. There are a couple of free downloadable images that go with the covergift so feel free to use those in your cards. The challenge is in two parts, the first is to make any card you like using the free gifts and basics from your stash (card, backing papers etc) and the second part is to CASE a card using the free gifts either by Copying and Sharing Everything from a card in the magazine (please give the designer name and page number details) or if you've seen the free gift used on any sort of social media - Facebook, YouTube, Pinterest etc then please provide a link so we can all see where you got the idea from. Ideally the cards should be as near to the original as possible but don't be afraid to add your own twist if you want to (more of a scraplift card than a CASE one) especially if you don't have the exact materials as the ones used in your inspiration card. I am very excited to see what everyone comes up with and love the idea of a CASE element as I rarely copy exactly. Please please though remember to credit the original designer as intellectual theft is as bad as physical theft and I'm sure none of you would do that!

UPDATE: I suddenly realised while watching the tv that I'd not actually added a closing date for the blog challenge - it's in just over two weeks 14/02/18.

Are you up for the challenge??


For some extra inspiration check out the lovely Christina Griffiths
AKA Card-Making-Magic.com's video over at YouTube as she shares a couple of ideas using this free gift and a full tutorial - https://www.youtube.com/watch?v=tEj1cIsOECU&t=6s

I hope you'll join in with our blog challenge, I'm afraid there's no prizes (who knows if people actually join in we might get some companies interested in sponsoring a prize or two!) at present just the satisfaction of taking part and crafting. I really hope you do, as always if you have any questions then please leave them in the usual places and of course a link to your blog (drop me an email using the form in the side bar if you don't have a blog but want to join in) if you take part and until next time - keep crafting!

Love and crafty hugs,

Sarah xxxx

Tuesday 23 January 2018

Tech card by a technophobe

Hello crafty peeps and welcome to my crafty nook! I hope you've all had a brilliant weekend, we've had a bit of snow but it hasn't settled fortunately. We're having a few problems with our computer at the moment so if I vanish for a few weeks it's probably because we've taken our hard drive in to be repaired for the THIRD time! I really wish Microsoft would sort Windows 10 out properly, we've had to pay twice for Windows 10 to be installed at a total cost of £140 and I refuse to pay a third time - it's really eating into my craft budget *angry face*. The computer keeps trying to install updates and it seems ok but when it configures (not actually sure what that means) after the restart it goes so far then just freezes onto a blue screen with the microsoft logo on it and nothing happens. We then have to somehow get the computer to restart itself, repair itself, remove the update that it says has failed to fully install and then reboot again. The main problem is it keeps trying to install the stupid update (or a number of stupid updates) and the exact same thing happens again. I don't understand computers - tbh I barely understand my phone but things like this just make me even more of a technophobe, not less of one I'm often tempted to see if kicking the damn thing would make it work properly lol.

Being a technophobe it's quite ironic that the card I'm sharing today features yet more technology, but an iPhone and xBox controller in this case. I've only met my niece's partner once so it was quite hard to know what sort of card to make him for his birthday as I don't really know him. I asked my niece what he liked and got the reply 'computers and xBox and stuff like that', not a huge help but you work with what you've got and luckily I do have an oldish stamp set from Clearly Besotted Stamps which is called "Text Me" that has an iPhone or similar and a wireless controller plus a few 'text speak' stamps. I'm not a huge fan of text speak as I'm sure it's one of the reasons a lot of people are abysmal spellers, language may be continuously evolving but it needs to be intelligible to everyone not just a select few! This isn't even a 'grumpy old woman' rant because one of my friend's is only a few months younger than I am and half the time I can't understand the texts she sends me even when I try to read it out phonetically. I'm particularly not keen on the text speak I've used on this card as it sounds like I'm ecstatic that he's got some high end bathroom fixtures  (bidet!) - I'm sure Michael will like it though 😉


To make this card I started with the background and cut a panel of Bristol Board to 4" x 5 1/2" so that it would leave a border on an A6 card blank. I ink blended a background using Tumbled Glass, Mermaid Lagoon, Salty Ocean and Peacock Feathers - this was my base layer which I further distressed using a distress sprayer filled with water. I dried this off using a heat tool and didn't really like the results so I went over the panel using a bit of Chipped Sapphire, Mermaid Lagoon and Lucky Clover distress inks, again I lightly sprayed with water but blotted it straight away for a more subtle look. I dried it again and put it under my glass mat while I worked on the rest of the card so it could flatten out more. I stamped the controller handset being careful not to ink up the lead using Versafine Onyx Black ink as I wanted a crisp dark image and did the same with the phone but I added the OMG sentiment onto the screen. I dried the images with my heat tool to prevent smearing the ink and then fussy cut the images out. I used a Memento brush pen to go over the edges so there wasn't a distracting white edge where I'd fussy cut and added double sided foam tape to the phone and d/s tape to the controller and put to one side. The distress inked background piece was nicely flattened by this point so I stamped icons from the stamp set using  Memento Tuxedo black ink in a random pattern to make my own bespoke patterned paper. I added this panel to a pre scored card blank from my stash (Dovecraft brand) then added the tech toppers as shown.

I really like the background I made, it appeared a bit splodgy to begin with but the colours smoothed out once it had thoroughly dried. I'd really like to use this Bristol Board with the new Distress Oxides because I've heard many good things about them and I must admit that I've had less trouble blending on Bristol Board then I have on any other card, so I'm very curious to see the Oxides on it but alas I don't own any - yet!

I hope you like my latest creation, I readily admit I find men's cards particularly challenging so I hope I've inspired some of you for your manly makes 😉 Michele and I are planning to resume our joint blog challenge soon using magazine freebies so I hope you'll keep an eye out for that and hopefully join it too. If you have any comments or questions then please leave them in the usual places and I will try to get back to you if needed. Until next time - keep crafting!

Love and crafty hugs,

Sarah xx

Tuesday 16 January 2018

A Blue Hot Air Balloon for Blue Monday...(and a card!) but added on the Tuesday - cheer up Tuesday perhaps?

Hello crafty peeps and welcome to my crafty nook! I hope you are all well and not too 'blue' on Blue Monday. I'm not sure why there's suddenly a need to practically give every day a special name - Blue Monday, Black Friday, Cyber Monday etc etc, but I wish they'd stop! TBH every day is a special day and I don't know why we have to have extra labels on them - it's just an excuse to try and get you to buy even more stuff you neither need nor can afford (I think Blue Monday is so called because it's when people start to get their credit card statements etc and realise how much money they actually spent on Black Friday etc on those 'bargains' and they get all depressed about it - I could be wrong though so feel free to put me straight if you want 😉) I know January can seem like a very long and gloomy month but on the bright side it's not long until Valentine's Day (and my dad in law's birthday!) so that's something to look forward to - I've even started on my husband's Valentine's card. #smugface

It was my mum's birthday last week and I've been working on a paper mache hot air balloon to give to her for quite a while (started September but obviously had a lot going on between then and now) and as she was coming round for a visit this morning I finally got my finger out and finished the project by making a heart shaped basket to hang underneath. I've tried to make the hot air balloon shabby chic, a style I much admire but find quite difficult to utilize within my own crafting.  Please excuse the photos, I'm still trying to get used to my new camera and I was also taking photos in the hallway because there just wasn't room to hang it and take photos in my crudy, though now I'm thinking about it I could have hung it on the coat hook at the back of the door!


The basket is made from two scalloped diecut hearts 

I'm afraid there's only one photo of the actual balloon and not even a good one at that! I did have a second one but it's too blurry to use. The second photo is one of the steps I took to make the heart shaped basket. I die cut two large scalloped hearts out of pale blue card and the cut a strip of matching blue card to make the bit to link them together. It measured 21cm by 7cm and it was scored either side at 1cm the at 10.5cm. I ended up cutting it down slightly as it overlapped the longest scallop on the hearts. I folded it in half and snipped a thin wedge off both sides to mitre the middle scoreline so that I could form the card piece into an L shape. I used wet glue to secure the joints and then stuck one side down to a scalloped heart using an acrylic block (as shown) to weigh it down while it dried. Once it was dried I repeated the process with the other side and decorated the front with half back pearls. I used a small hole punch on both sides of the inner part of the basket to punch two holes and threaded black thin craft wire through them both. The balloon itself was made using paper mache (strips of newspaper and watered down PVA glue - extremely messy to do!) It probably took about a fortnight to add all the layers of paper and allowing it to dry between each layer but once it was completely dry and of an even thickness I popped the balloon and removed it from the paper mache shell. It did soften a little during the painting process and the next time I make one I'll do a layer of gesso first before adding paint just because you could actually read some of the newsprint even after three coats of paint. For a truly shabby chic effect you could make this work for you by adding torn book pages as a final layer (an old dictionary or botany book would work well for this) so that the words and illustrations sort of peek through the paint. I decorated it using ivory coloured lace and pearl drop strands plus clear dew drops (not visible on the photo). I attached the basket to the balloon using the thin wires and added another wire from the top of the balloon so it can be suspended from the ceiling or in my mum's case in her lounge window.

It was my nephew's birthday on Friday and I had to make him a very quick card to try and get it in the post on time. I used the music themed stamp set (and some inspiration from the magazine!) that came free with this month's Creative Stamping Magazine.


A stamping platform is useful for making a short stamp seem longer

I made this card by ink blending Fossilised Amber, Spiced Marmalade and Fired Brick Distress inks on a sheet of Smooth Bristol board paper using a round foam applicator and foam pads (Woodware), once I was happy with the coverage I spritzed it with water and dabbed it off with kitchen roll. I dried it with my heat tool and popped the piece under my glass mat while I stamped the shadow dancers on a strip of white card using Versafine Onyx Black ink. I used my Crafts too Stamp To Impress stamping platform just because I wanted the dancers to be really black and it's easier to double stamp if necessary using a stamping platform. I stamped a Happy Birthday sentiment out and die cut it using a stitched circle die. The distressed ink card was now flattened from being under my glass mat so I stamped a pattern on it using stamps from the stamp set as shown, again I used Onyx black ink but used acrylic blocks to hold the stamps rather than my stamping platform because it's easier to stamp the same pattern multiple times if they are on separate blocks. Once the ink was dry I added the 'patterned paper' piece to a A6 card blank, added the dancers using foam tape and added the sentiment as shown. I added some orange gems to the centres of some of the note mandalas and a couple to the sentiment circle.

It probably took about an hour to make the card and unfortunately I did put the dancer strip on slightly crooked but the foam tape was stronger than I realised and I couldn't move it without ruining the whole card so I had to leave it crooked - still it proves it's hand crafted I suppose!

I hope you like my latest makes, sorry the photo quality isn't the greatest - The balloon is actually quite pretty in real life and my mum seemed thrilled with it which is the main thing. I probably will have another attempt at making a hot air balloon at some point just because this first one was a learning curve and I now know what to do and not do so I'd like to see if I could make a better one for my mum. I did enjoy making the card for my nephew, as I've said a few times I find it rather challenging to make men's cards so I'm sure I'll be putting the stamp set from Creative Stamping magazine to good use as they are good for all sorts of occasions and for both sexes. As always if you have any questions or comments then please leave them in the usual places and until next time - keep crafting!

Love and crafty hugs,

Sarah xxx

Friday 5 January 2018

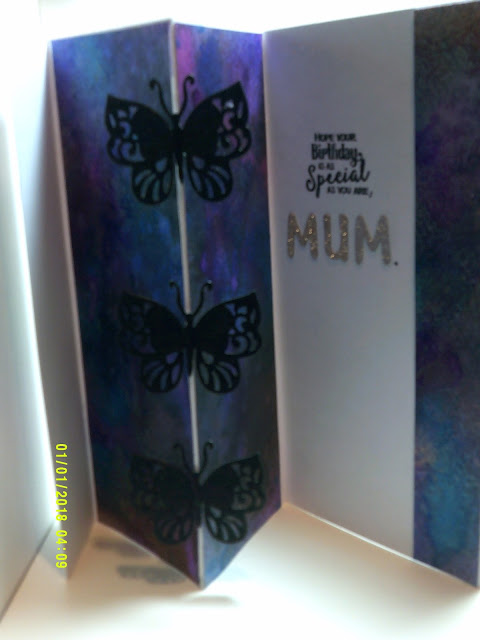
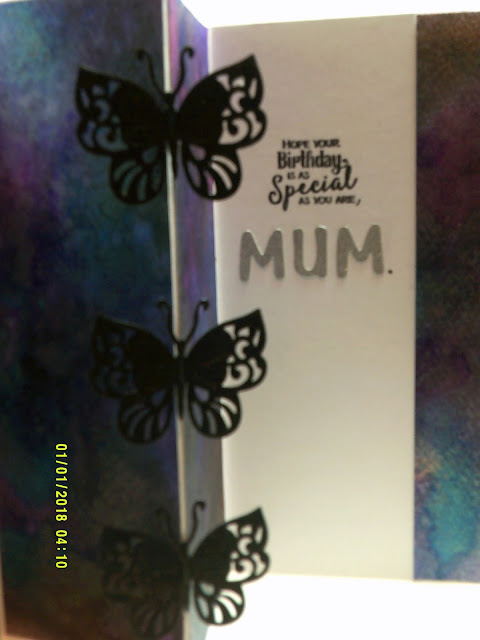
A butterfly card for my mum.

Hello crafty peeps and welcome to my crafty nook! Happy 2018 to you all!! I hope you are all have a great year so far and a good week too. If you're not be consoled by the fact that it's almost the weekend - yay for that Friday feeling! I am trying to be a lot more organised this year and I've already made nine Christmas cards. I'm not going to share them with you today because I forgot to take any photos of them. I may have a bit of trouble in future taking photos because there was a slight craftquake in my crudy last night and a couple of boxes fell off the shelf above my workspace and landed on my daylight lamp and on my head and shoulder! I've got a bit of a headache today but worse is the fact my daylight lamp is broken or at least near as - it flickers and makes a strange hissing sound when it's switched on. I can't seem to work out how to remove the three tube lightbulb so I can buy another one so I'm not sure what I'm going to do about it. Without it it's rather hard to craft as the main light in my crudy is very dim and we don't have any spare bulbs at the moment. Anyway enough of my troubles and woes (which are very slight as I'm the first to admit!) it's my mum's birthday on Sunday so I've made her a butterfly themed birthday card. I'm not sure how good the photos are using my new camera, it's still very new to me and it doesn't come with proper instructions just a start up guide and a troubleshooting leaflet so I'm not really sure what I'm doing with it if I'm totally honest and the picture quality doesn't seem to be any better than my old camera (maybe I'm just a bit rubbish at making cards - eek!)


First of all please ignore the time/date stamp that appears on each of the photos - I've no idea how to remove it from the saved photos (it'll be really annoying to have that on any photos I print off!) plus it's actually the wrong time and date as I forgot to set it on the camera. The colours are quite good on these photos but you can't see the shimmer and gold shine that there is in real life unfortunately. To make this card I first worked on the watercolour card panels. I have a pack of watercolour card from Amazon which is approximately 8" x 5" and I used two for this card. I have a number of shimmer ink sprays and I started by spraying the card with blues, pinks and purples. I allowed them to dry then added goldtone black, midnight black, silver black and white shimmer sprays over the top and again allowed it to dry before adding further colours on top. I wanted a sort of galaxy background combined with the iridescence of a butterfly's wing, I'm not sure if I've quite achieved that but I'm very pleased with how the backgrounds came out. I allowed the panels to fully dry for a couple of hours while I made the rest of the card. The next thing I made was the floating butterfly elements. I die cut one of the dies that came in my Advent calendar from Crafter's Companion three times out of black glitter card stock (The Works 6" x 6" glitterstack only £1.50 but I'm not sure if they sell it anymore) and six times out of plain black card. You need three butterflies for each floating element. I cut the antennae and the lower part of the body off the plain black butterflies just leaving a small strip linking the wings together. I folded these butterflies in half and added them one butterfly wing to wing per side of the back of the glittery butterflies so that the glittery butterflies are flat on top of two halves of the other butterflies (if this isn't clear please let me know and I'll add a photo step by step tutorial to the blog) with the other halves of the butterflies sticking down underneath the glittery butterfly - these will be stuck down either side of the final fold in the card to form hinges so the butterfly can move from side to side. I used wet glue in a fine tipped nib bottle to adhere all the butterflies. I put the butterflies under something heavy so the wings wouldn't shift out from one another and made the card blank. I wanted to make a bigger than normal sized card so used an entire sheet of 300gsm white card. I scored it at 5cm, 12cm and 19.5 cm and from the left side in I folded it valley, mountain, valley to form my card blank - you may recognise the style as it was a firm favourite last spring and I made quite a few of them lol. To update it I combined it with the hover card style I made last September. Once all my elements were dry and ready to use I started to assemble my card but first I had to cut my watercolour panels to fit my card. The front panel was cut to 4.5cm by the full length of the card (around 8") which leaves a very thin border around the panel and it was adhered to the front of the card on the shortest panel as shown. I then added a 2.5cm wide strip of the  watercolour paper to the right hand side of the card again this left a very small border of card showing around it. It was time to add the butterflies and I started with the middle one first adding it to the centre of the mountain fold by sticking the loose wings either side of it with wet glue - I held the wings tightly against the card until I was sure they were well stuck down. I added the remaining two butterflies in the same way above and below the middle one as shown. I cut the remaining pieces of watercolour card to 7cm by the full length and stuck them on the mountain fold panels covering up the half butterfly wings that were already adhered there. Because you need to cover these wings as much as possible the white card border should only be apparent on three sides of the panel as the watercolour card should be as close to the edge as you can get them. I added a die cut Happy Birthday to the thin front panel and a sentiment and a glittery silver die cut mum to the inside to complete the card. As it's a bit bigger than a normal card, I made an envelope using my WRMK Envelope Punch Board out of a sheet of scrapbook paper.

It's one of those unfortunate things that it's next to impossible to capture the shimmer and shine of this card in a still photo, even in real life you need to move the card so the light can catch the shimmer and make it pop so these photos really don't do the card justice. I've got to say it's one of my favourite cards (certainly of this year lol) and I really hope my mum likes it. I haven't got things set up to make video tutorials yet though that's certainly one of my goals for 2018 but I think I need to master taking stills before I progress to videos and I think it's fairly obvious from these photos that I have a lot of work ahead of me!

As always if you have any questions or comments then please leave them in the usual places and until next time - keep crafting!

Love and crafty hugs,

Sarah xxx