Translate

Monday 26 February 2018

FINALLY!!! Blog Challenge Cards

Hello crafty peeps and welcome to my crafty nook. I hope you have all had a brilliant weekend, we are bracing ourselves here in the UK for a spot of nasty weather with freezing conditions and even lightening storms forecast in the coming week, there's a possibility that it may last until the middle of March which isn't good news. If it is as bad as predicted then I may not be blogging as often because I'll probably invite my mum to stay with us. Our flat is a lot easier to heat (hers doesn't even have central heating just ineffective wall panel heaters that are designed to heat unused rooms to prevent pipes from bursting!) even if it's not in town like hers is (making shopping challenging - thank goodness for being on a bus route AND internet shopping!). If she does stay over she'll be taking over the lounge as we don't have a spare room but the put you up bed is comfy enough and we have spare bedding etc, the downside of it is that the computer is in the lounge and I like to write blogs etc late at night and my mum likes to go to bed early so unless I change my writing habits I'm not going to be able to add blogs like usual. Of course she may choose to stay at home so it might not even be an issue - watch this space!

Let me apologise to all my readers and especially to my fellow blog challenger Michele for the delay in getting this blog post up. Michele sent me photos of her gorgeous cards more than two weeks ago and it is totally down to me that they've not been shared before now. There were some extenuating circumstances (losing my mojo, then one of the finished cards, running out of batteries then getting new ones not realising that re-chargeable ones need to be charged before first use lol) but I should still be more organised when it comes to crafting (and most other aspects of my life really). Anyway we'll start with Michele's gorgeous creations.

Michele's first card is the CASE card and is copied from the one on page 67 of the magazine.


Isn't it lovely? Her second card is her non-CASE card and is a very sweet Christmas card.


I love the way Michele has managed to turn a very floral embossed image into a frosty Christmas design while still retaining the wreath elements. I absolutely love the silver snowflakes - very apt considering the forecast and a great addition to a card that would be perfect for batch making (you could use different colours for the embossed panel - white would look stunning especially if it was a shimmery white cardstock such as Centura Pearl hint of silver).

Here are my two cards - my CASE card is more an inspired by than a true CASE card as I wanted to make it into an easel card and I didn't have some of the components needed such as the scalloped circle die cut and the same card stock colour.

My inspiration


As you can see, the butterfly, flowers and placement on the embossed image are the same as the inspiration card but I used Core'dination card in green and sanded the embossed image back using some sandpaper. The flowers, leaves and butterfly were diecut out in white then coloured in using Promarkers. The easel card was made by folding a piece of white card in half and placing it on a Bigz circle die with the folded edge slightly below the cutting area so it didn't cut through both layers at the top. It makes an imperfect circle but as another circle of the same size was layered on top, you can't tell. The easel part was made in the usual way.


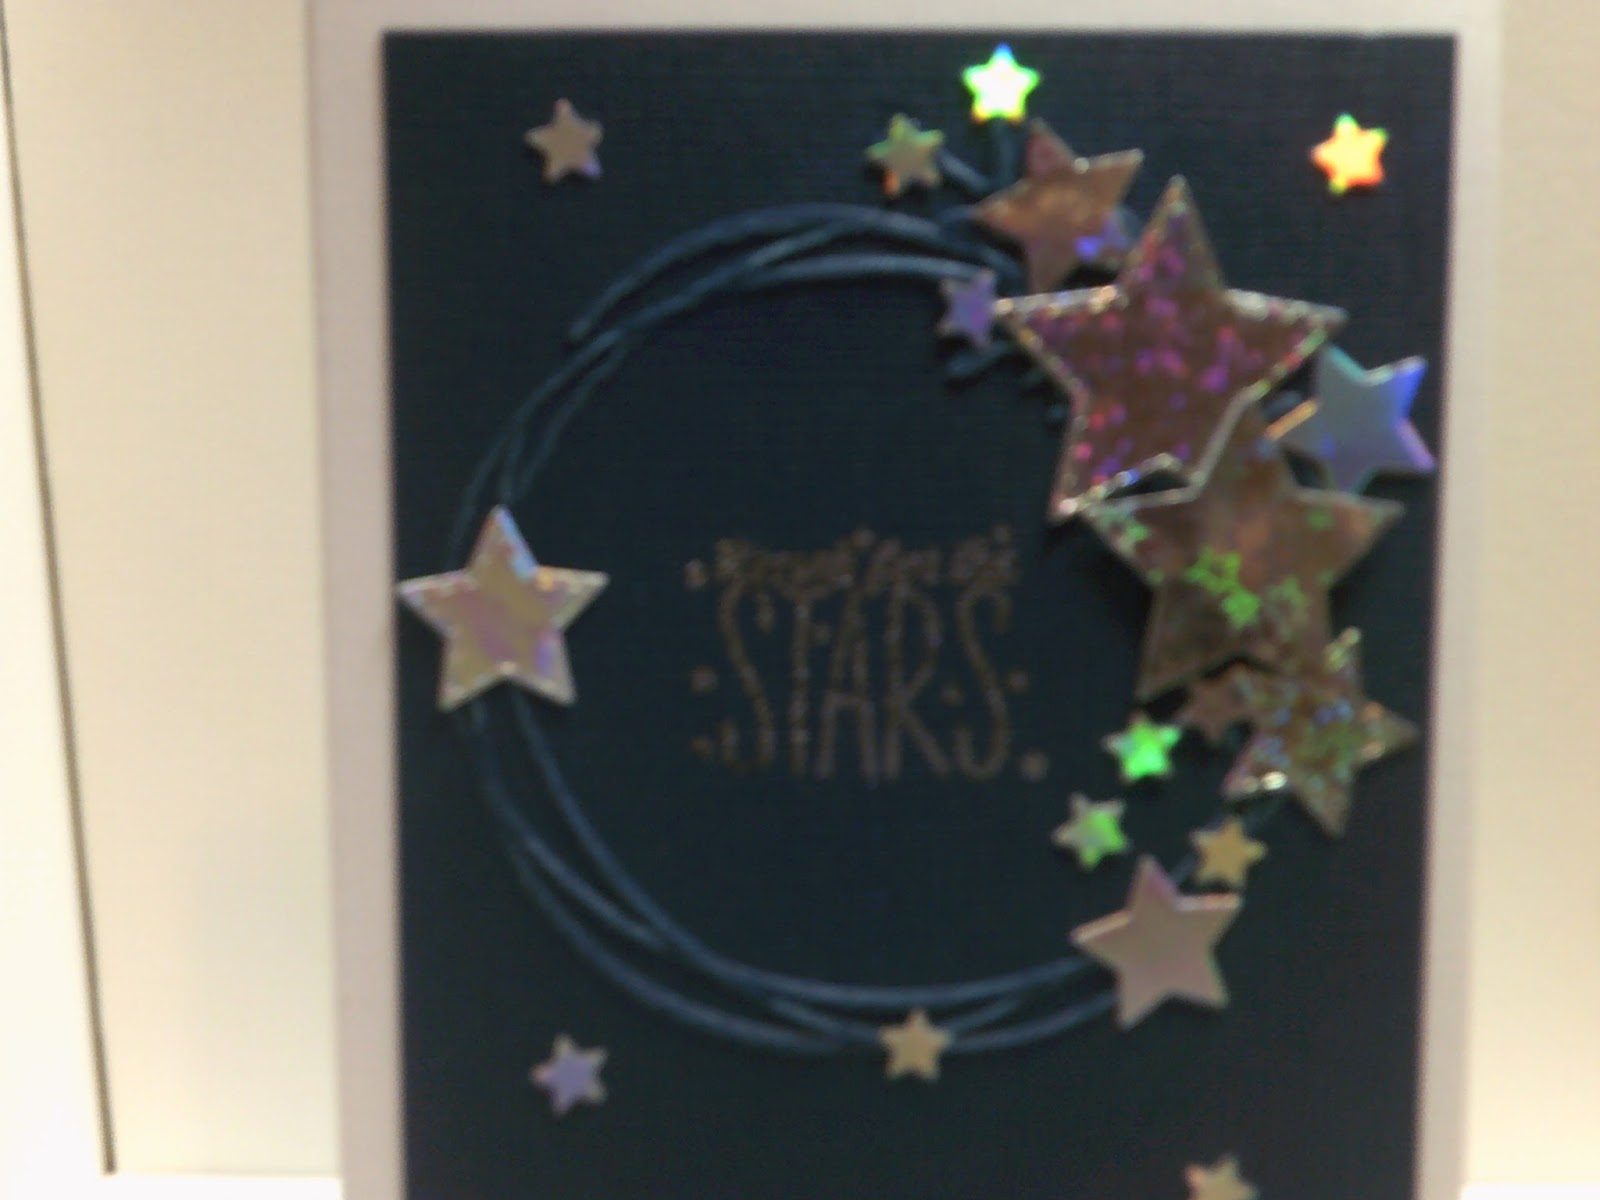
As soon as I saw this magazine freebie I knew I wanted to make a non-floral card with it. One of the things I dislike about the freebies you get with craft magazines is that they often lack originality - around half of them are floral, a quarter are Christmas and the remaining quarter cover everything else like men's cards and kids. I'm not actually a huge fan of florals as I like to make cards that reflect the recipient's personality (hobbies, favourite colours, animals etc) and flower cards seem a bit generic in my mind. Stars are gender neutral so a bit of a favourite for men's cards if I'm unsure of their likes or if I don't have anything suitable that they would like (for example it was my brother-in-law's birthday on Friday and he likes penguins and tartan - both are Christmas items and I couldn't get what I had in my stash to work on a birthday card so I made him a card with a starry background and a spaceman with a die cut star on the sentiment). This card was a good way to use up some of my scraps too as I die cut a lot of various sized stars to cover the floral elements of the embossed wreath. The wreath was embossed into some navy blue Core'dinations card and lightly sanded to highlight the wreath. The stars were die cut out of scraps of holographic card and the tiny stars were punched out of rainbow holographic card - in that case I used the perforated strip from the top of a 6" x 6" card piece taken from a paper stack (The Works, sadly no longer available as it was only £1.50 for 24 sheets of foiled card stock including the rainbow holographic card, I really wish I'd bought loads of them now!) I stuck the stars over the floral elements of the wreath as shown and added some of them with foam squares for added interest and also a scattering of the tiny stars on the unembossed areas. The sentiment was from my stash and heat embossed directly onto the topper piece.  It says reach for the stars but isn't very clear as I don't own any fine detail embossing powder. I made matching envelopes for both my cards using my envelope punch board by WRMK.


I hope you like Michele and I's cards - it was a really interesting challenge as neither of us CASE cards very often and I love the way we both chose to make non-floral cards for our second cards. I'm not sure what our next challenge will be - I think I might 'challenge' Michele to come up with a theme. Once it's been set, I will share it on here. If you have any questions or comments then please leave them in the usual places and until next time - keep crafting!

Love and crafty hugs,

Sarah xxx

Thursday 22 February 2018

Birthday Cards

Hello crafty peeps and welcome to my crafty nook! I hope you are all well and looking forward to the weekend, I'm sorry I've not posted the Blog challenge cards but my camera turned out to be a battery eater as I suspected and I've only got some new AAA batteries today! I haven't had time to put them in my camera yet but hope to have the cards up over the weekend (mind you I said that last week!!!)

There's been a couple of family birthdays in the last week or so so I thought I'd share one of the cards I made with you today. This card is an extra special card for my dad-in-law who recently turned 65. He's a keen photographer so I decided to make him a pop up polaroid card inspired by one I saw featured in the questions pages of a craft magazine. Because the main focus should be on the inside, I kept the outside panel simple using an embossing folder by Sara Davies.


I used thin washi tape for the three coloured stripes on the camera, matt silver card for the main part of the camera, silver mirror card for the metallic elements such as the flash and the view finder, black glitter card for the lens, flash, view finder and button, red foil card for the heart and black card for the pop up part of the camera. The polaroid photo was made with a piece of black card matted onto a piece of white like a polaroid picture. I stamped out the greeting in white ink and heat embossed it with white embossing powder (I used my anti static bag first to prevent stray powder sticking to the card in other places). I've actually made a second card in this style because it was so much fun (though rather time consuming) to make and I'll be sharing it along with some instructions on how to make this impressive card at a later date.

I was hoping to share a card I made for my niece but unless it's on my camera (which needs new batteries) I must have forgotten to take any photos of  it and I can't even remember what it was like lol.

Hopefully this card is enough for now, if you have any questions or comments then please leave them in the usual places and until next time - keep crafting!

Love and crafty hugs,

Sarah xxx


Thursday 15 February 2018

Love, Love, Love...

Hello crafty peeps and welcome to my crafty nook! I hope you all had a lovely Valentine's Day - we had a rather quiet day just spent together, we did have a takeaway but that was more down to the fact I forgot to take the steaks I'd got out of the freezer and by the time I realised it was too late to have them on the day - still they made a lovely day after Valentine's day meal.

I can finally share the finished card that I made for my lovely husband and a couple of other cards I've been making.


This card was inspired by the Taffleberry Lane '5 Cards in 5 Minutes' YT video I watched earlier this month - it inspired me so much that I made the love hearts topper straight away and I've shared that in an earlier post. This card features the topper but attached at the top so that the 'bottom' can wiggle. Here is a link to a tutorial by Taffleberry Lane with a step by step guide to how to make this card and another sexy underwear card. https://www.youtube.com/watch?v=snPjsZdJg1M&lc=z22burxzsya5z342dacdp43a3eonmvl4vdqk03g5if5w03c010c.1518479698179306  Antonia (AKA Taffleberry Lane) has done a brilliant tutorial and there is little point me repeating it on here though I did use larger heart dies for my wiggly bottom and I also added an additional flesh coloured heart (tan and putty promarkers were used to colour all the flesh coloured pieces) to the top of the bodice and the peephole to the inside of my version is a scalloped circle instead of an oval but that's only because I've only got small oval dies. I chose to give my legs black stockings instead of fishnets mainly because my first attempt at drawing fishnets was terrible and my tan and putty promarkers are on their last legs (lol)and I didn't want to have to start all over again as I'd already stuck the flesh piece to the bodice piece prior to drawing in the stockings. The "Perfect Husband" die is from Tonic Studios, the "Happy Valentine's Day" stamp was one from the Crafter's Companion Sentimentals 'Love' themed set of stamps and the large 'with Love' was a wood mounted stamp from The Works. The hearts were made using a small heart die from my stash and were coloured with red promarkers and coated with a layer of Glossy Accents. The glittery dots heart was die cut using DCWV glitter card stock as was the glitter black card elements, the silver word die cut was made using some scrap silver foil paper which I think came from The Works - all the red foil hearts came from my scraps. The top and bottom decorative pieces on the front of the card were made using a CC die set that came free with one of my magazines.


I wanted to send my mum a Valentine's card this year through the post because she doesn't get a lot of post and I thought it would make her smile. This isn't the exact card as hers had a white panel instead of a black one. This card uses the inlaid die cutting technique which is something I've not really tried before. It is quite time consuming because to make this card I had to die cut the heart die five times. Twice on the black card, once in red foil, once in white card and finally once out of holographic silver card. I heat embossed the Be My Valentine sentiment using Wow white embossing powder and a sentiment from the Love set used earlier.

The last card I'd like to share is a Get Well Card I sent to my sister. She had a couple of procedures at hospital last Thursday and I made her a cheery card to send, it took a crazy amount of time to get to her (I posted it on Thursday afternoon and she didn't get it until Wednesday! We share part of a  postcode so it's very vexing that it's taken nearly a week to travel 20 miles or so!)


The circle die came through the post from eBay the day I was making her card so I thought I'd test it out on the GWS card. I die cut it out of a white panel of card then ran it through a second time inside an embossing folder (one of the Sara Signature For the Men range) I added some colour on another piece of card cut to fit under the die cut circles so they showed through when stuck to the back of the front piece. I added a Get Well Soon sentiment using a stamp from my stash and added the panel to a card blank. I stamped another sentiment inside and added two paper plasters either side as shown.

I hope you like my latest creations and that you'll take some time to watch Taffleberry Lane's excellent YouTube video, better still subscribe to her channel - she's very funny and hugely talented and even if you're not really a crafter, her videos will make you laugh out loud (not all are funny but look out for the photo bombing bears or the thieving racoons!). I'm hoping to share the blog challenge card over the weekend, Michele has make a couple of stunning cards as always and I've nearly completed my cards too - apologies for being late again it's been a weird couple of weeks and I've not always felt like crafting. As always if you have any comments or questions then please leave them in the usual places and until next time - keep crafting!

Love and crafty hugs,

Sarah xxx

Sunday 11 February 2018

A few cards to share.

Hello crafty peeps and welcome to my crafty nook! I hope you've all had a brilliant weekend, I've not really done much to be honest apart from watch the brilliant last episode of "Hard Sun" on the BBC (Saturday), I re-tuned our topset box on Friday because a lot of the channels were out of service and Create and Craft and Hochanda have now vanished from the menu. I'm not a huge fan of either craft shopping channel but was quite nice to check out some of the new products out there which I can't do now. My lovely husband told me to make an online order up to £30 for Valentine's (isn't he lovely!) so I put some money towards it and purchased some dies and a scrapbook pad from Crafter's Companion because they had a really good offer on and double points this weekend. I only need 248 points to stay a gold member to the end of 2019 and I now rarely shop at CC so the 74 points from my order will take a big chunk out of the ones needed. Hopefully they'll have the usual double points and bonus points events too so I can spend less but remain a gold member.

I've mainly been working on the Valentine's card for my lovely husband but I have made a couple of birthday cards too. The first card I'd like to share is the one I made for my niece who turned 12 on the 6th.


The final photo may not look that exciting but it actually rips down to reveal some money that we gave our niece in addition to a pretty bracelet. I love this die as it means I can send secret messages in cards (it would be great as a reveal the sex of a new baby for example) and for sending money or gift cards without worrying about them falling out accidentally while going through the postal system - it doesn't happen very often but envelopes can get mangled in the post and this way the money etc has less chance of falling out of the envelope if it does get chewed up.


I love shaped cards and this one was easy to make thanks to an apron shaped die set I bought from eBay. I made the card front by folding a piece of card in half and carefully placing the cut line at the top of the apron above the fold line so it wouldn't cut that bit when I ran it through the die cutting machine, I then cut another complete apron piece to go over the front. The die cuts out slits where the pockets are and although it didn't cut all the way through the back piece, it did emboss a line so I covered it with a piece of star card to match the pockets on the front. The die set has lots of additional pieces as well as the main apron die including a rounded pocket die, various utensils, an oven glove (very sweet, it even embosses a pattern into the glove like the stitching on a real pair!) and even a set of salt and pepper shakers! I used a few of these to decorate the card and added a couple of stamped sentiments plus some baker's twine for the apron strings.


This is probably my favourite card and it was probably one of the quickest to make. All the dog stamps are separate even though they are meant to be a background stamp (even the partial dogs which is very strange) but that's one of the downfalls in buying cheap stamps from China. However it wasn't too difficult to actually stamp the dogs straight etc thanks to my stamping platform tool. I lined the bits of dog using the grid on the lid of the stamping platform on one side then added the rest of the dogs using the first ones as a guide to placement. Then all I had to do was ink them all up in one go and press down, repeating until I got a perfect impression - I should have done multiple prints while they we all lined up but in all honesty I'm not sure how often I'll actually be using the stamps though I love how this card turned out. I coloured all the dogs in shades of cool grey (minus cool grey 1 as it's dried out and I need a new one) and coloured the hats, bows, coats and flowers etc in a combination of burgundy. crimson and poppy promarkers. It seemed a bit bare with just the dogs on so I added some bows and bones to fill in the gaps. The bows were coloured with the crimson and poppy promarkers and the bones were filled in with clear shimmer brush pen. I edged the piece with the crimson marker to make it pop a little and added it to an A6 card front. I stamped the 'you're pawsome' greeting and die cut it out using a flagged end die and added it to the card front with some foam tape.

I hope you like my latest makes, hopefully I'll have some more cards to share in a couple of days. As always if you have any comments or questions then please leave them in the usual places and until next time - keep crafting!

Love and crafty hugs,

Sarah xxx

Thursday 1 February 2018

Hide my blushes!!

Hello crafty peeps and welcome to my crafty nook! I hope you are all doing well, can you believe it's February ALREADY!!! Where on earth did January go?? It's nearly the weekend - YAY! I've made a couple of items in the last day of two so I thought I'd share them with you. The first is an eye chart text speak card which would probably suit a teenage - preferably over 15 as it contains swear words.


I'm not actually sure what all the letters stand for and this photo isn't the clearest so I'll add them here:- OMG, WTF, STFU, PWN3D, URANOOB,ROTFLMAO, KTHXBYE:P. Just in case you have the urge to look them up :)

My second make is the topper I've made for my husband's Valentine's card.


Seems fitting to use a burlesque filter - ooh la la!
Unfortunately I didn't come up with this topper on my own (I wish I was that creative!) - the super talented Taffleberry Lane on YouTube did, once I've finished the card I'll be sharing all the details about the inspiration behind it plus my own tweaks to the design. Once the topper is added to a card blank, the legs can be swung from side to side to give the impression of a sexy wiggle! I think my husband's going to love it!

Not a very long post for a change, if you get the chance please check out the post after this one as it gives the details of the next blog challenge. If you have any questions or comments then please leave them in the usual places and until next time - keep crafting!

Love and crafty hugs,

Sarah xxx