Hello crafty peeps and welcome to my crafty nook! I hope you all had a lovely Valentine's Day - we had a rather quiet day just spent together, we did have a takeaway but that was more down to the fact I forgot to take the steaks I'd got out of the freezer and by the time I realised it was too late to have them on the day - still they made a lovely day after Valentine's day meal.
I can finally share the finished card that I made for my lovely husband and a couple of other cards I've been making.
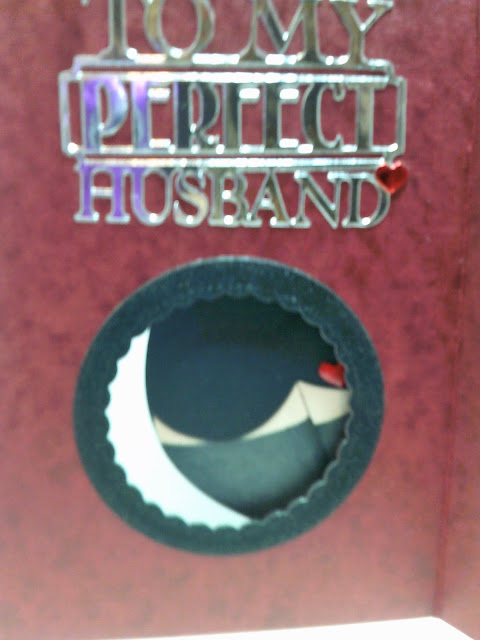
This card was inspired by the Taffleberry Lane '5 Cards in 5 Minutes' YT video I watched earlier this month - it inspired me so much that I made the love hearts topper straight away and I've shared that in an earlier post. This card features the topper but attached at the top so that the 'bottom' can wiggle. Here is a link to a tutorial by Taffleberry Lane with a step by step guide to how to make this card and another sexy underwear card. https://www.youtube.com/watch?v=snPjsZdJg1M&lc=z22burxzsya5z342dacdp43a3eonmvl4vdqk03g5if5w03c010c.1518479698179306 Antonia (AKA Taffleberry Lane) has done a brilliant tutorial and there is little point me repeating it on here though I did use larger heart dies for my wiggly bottom and I also added an additional flesh coloured heart (tan and putty promarkers were used to colour all the flesh coloured pieces) to the top of the bodice and the peephole to the inside of my version is a scalloped circle instead of an oval but that's only because I've only got small oval dies. I chose to give my legs black stockings instead of fishnets mainly because my first attempt at drawing fishnets was terrible and my tan and putty promarkers are on their last legs (lol)and I didn't want to have to start all over again as I'd already stuck the flesh piece to the bodice piece prior to drawing in the stockings. The "Perfect Husband" die is from Tonic Studios, the "Happy Valentine's Day" stamp was one from the Crafter's Companion Sentimentals 'Love' themed set of stamps and the large 'with Love' was a wood mounted stamp from The Works. The hearts were made using a small heart die from my stash and were coloured with red promarkers and coated with a layer of Glossy Accents. The glittery dots heart was die cut using DCWV glitter card stock as was the glitter black card elements, the silver word die cut was made using some scrap silver foil paper which I think came from The Works - all the red foil hearts came from my scraps. The top and bottom decorative pieces on the front of the card were made using a CC die set that came free with one of my magazines.
I wanted to send my mum a Valentine's card this year through the post because she doesn't get a lot of post and I thought it would make her smile. This isn't the exact card as hers had a white panel instead of a black one. This card uses the inlaid die cutting technique which is something I've not really tried before. It is quite time consuming because to make this card I had to die cut the heart die five times. Twice on the black card, once in red foil, once in white card and finally once out of holographic silver card. I heat embossed the Be My Valentine sentiment using Wow white embossing powder and a sentiment from the Love set used earlier.
The last card I'd like to share is a Get Well Card I sent to my sister. She had a couple of procedures at hospital last Thursday and I made her a cheery card to send, it took a crazy amount of time to get to her (I posted it on Thursday afternoon and she didn't get it until Wednesday! We share part of a postcode so it's very vexing that it's taken nearly a week to travel 20 miles or so!)
The circle die came through the post from eBay the day I was making her card so I thought I'd test it out on the GWS card. I die cut it out of a white panel of card then ran it through a second time inside an embossing folder (one of the Sara Signature For the Men range) I added some colour on another piece of card cut to fit under the die cut circles so they showed through when stuck to the back of the front piece. I added a Get Well Soon sentiment using a stamp from my stash and added the panel to a card blank. I stamped another sentiment inside and added two paper plasters either side as shown.
I hope you like my latest creations and that you'll take some time to watch Taffleberry Lane's excellent YouTube video, better still subscribe to her channel - she's very funny and hugely talented and even if you're not really a crafter, her videos will make you laugh out loud (not all are funny but look out for the photo bombing bears or the thieving racoons!). I'm hoping to share the blog challenge card over the weekend, Michele has make a couple of stunning cards as always and I've nearly completed my cards too - apologies for being late again it's been a weird couple of weeks and I've not always felt like crafting. As always if you have any comments or questions then please leave them in the usual places and until next time - keep crafting!
Love and crafty hugs,
Sarah xxx


More lovely cards Sarah. I really like the Get well Card. Like the idea of running the Diecut through an embossing folder for added interest.
ReplyDeleteMichele